The exterior face of the mansion in Unreal Engine.
You can see how I have applied the brick material to the walls. I have used parallax occlusion mapping to give them a bit of depth. I will be adding grime and other decals to the bricks to make it look less repetitive.
Close up of my brick material on the walls of the mansion.
The environment is feeling very sterile and empty at the moment. I've decided to strip out all the lighting and placed a neutral light source in the scene, so that I can get a good sense of how all the materials will look without interference from strong contrasting light.
As you can see in these images there are still a lot of things that need to be brought into the engine. I am currently working on the roof at the moment. It is a high priority of mine to make it look as good as possible as it covers such a large area of the mansion.
Creating a Custom Roof Material
I have started to create a seamless roof material in much the same way that I created my bricks. I found this to be a good technique when creating my brick material because using real geometry lets you easily generate height maps, and these were very effective with parallax occlusion mapping.
Below you can see how I have lined up the tiles on a 2048 x 2048 plane so that the pattern repeats evenly:
My roof tiles aligned to a 2048 x 2048 plane for easy texture tiling.
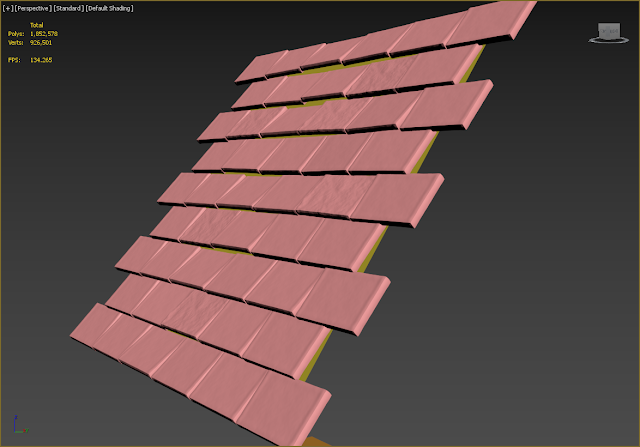
I've angled the tiles so that there will be some depth when it comes to the parallax occlussion mapping:
You can see how I have angled the tiles so that I get some depth with the height maps for the parallax occlusion mapping.
Here is the texture as it appears in Substance Painter:
The roof tile texture in Substance Painter.
I've baked the geometry onto the texture and now I need to hook it up in Unreal Engine. Once I have got the basic materials set up within my scene, I'm going to rebuild the lighting and do some experimentation to get everything looking the way I imagine.


No comments:
Post a Comment