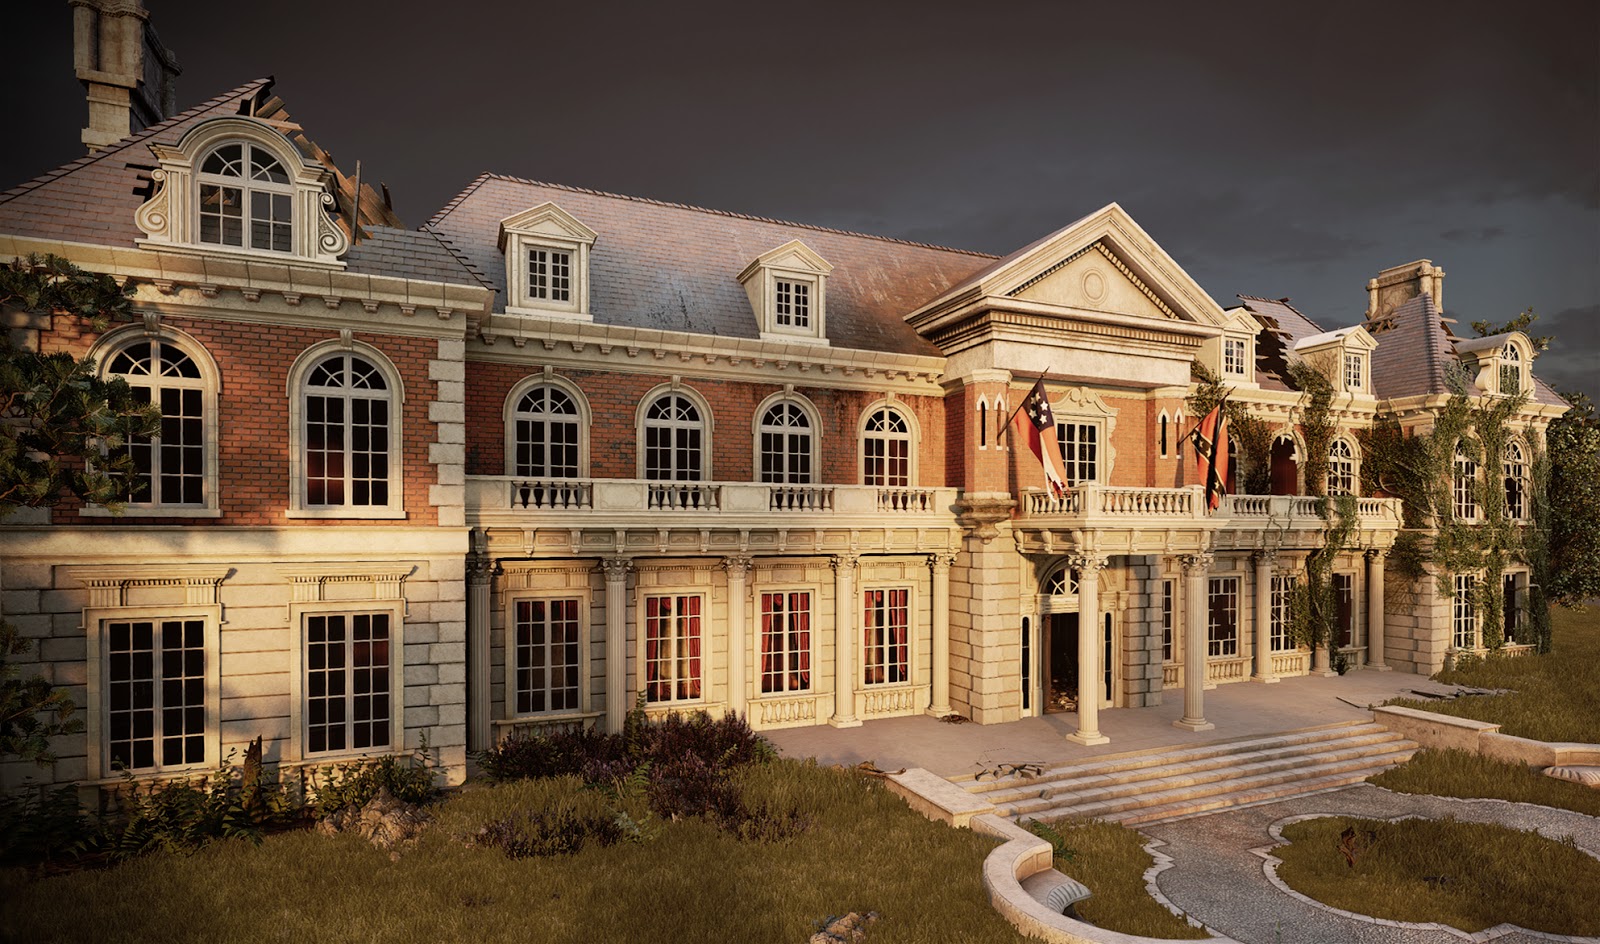
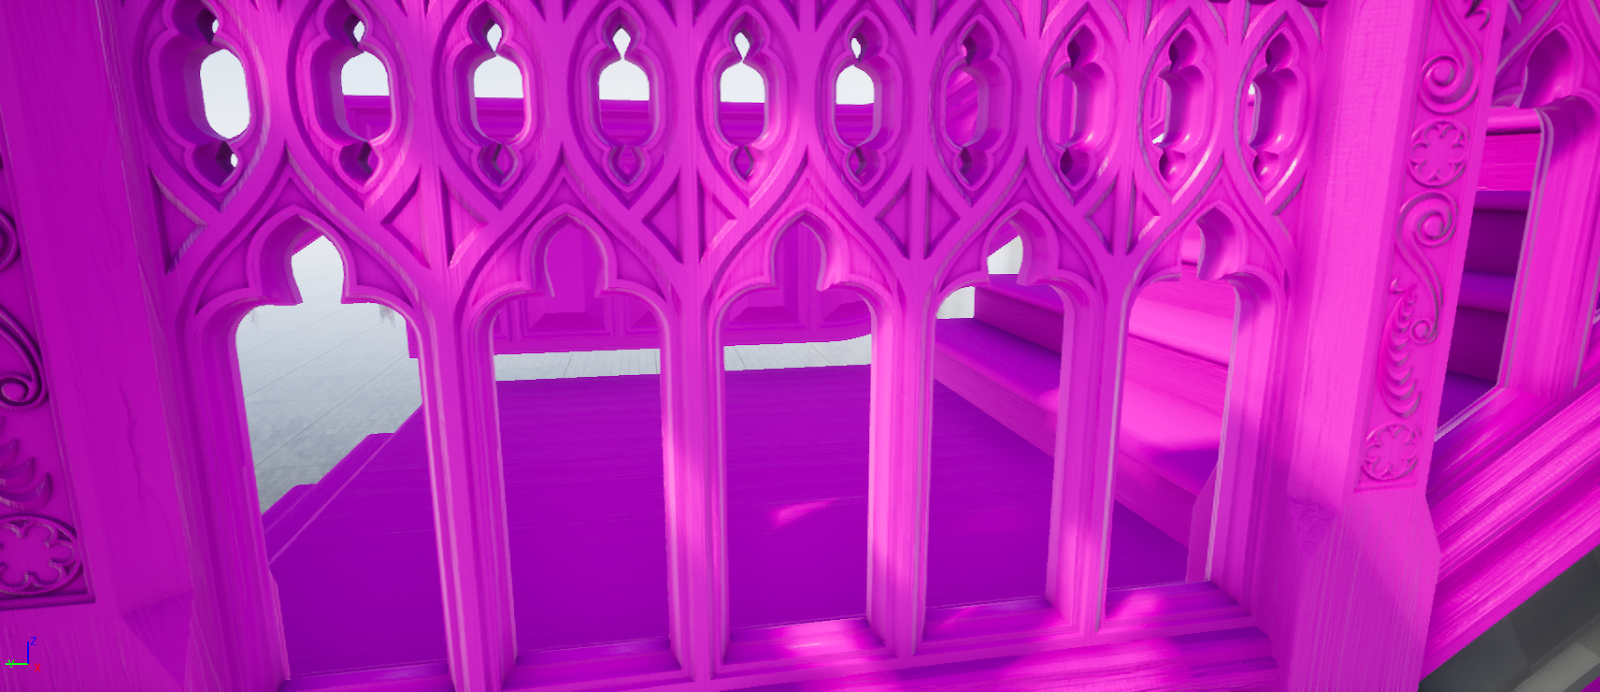
I have finally finished the environment. I will be spending the next few days preparing my presentation and editing my promotional video. You can view the full project on my artstation page or see the images below:
I feel that I have met my deadlines and made use of the resources that I have had available to me throughout the duration of this project. I was able to factor in the time I had access to the studio and build my project schedule around these timeframes. There are some areas I would have like to create like a larger garden and master bedroom, however I feel I have achieved what I set out to do, which was to create an environment that tells a story.
Showing posts with label Tuesday. Show all posts
Tuesday, 7 August 2018
Tuesday, 31 July 2018
Week 11 - Tuesday: Interview with Playground Games
I've just gotten off a skype interview with Don Arceta the lead environment artist at Playground Games.
I received some feedback on my major project environment that I will be adding to my Unreal Engine scene. The main points of critique were for the floor in the hallway, that he said looked far too rough, and that the walls that could perhaps have the imprints of where portraits used to hang on them.
One of the shots that I recieved feedback on.
I enjoyed the interview and have taken this as an opportunity to improve my handling of a professional interview setting. I was somewhat nervous but I tried to prepare for the interview by gathering as much information that I could, to answer any questions he may have had about my work. I was asked to reflect on what I felt was my weakest and strongest areas, but fortunately this question did not catch me off guard as I have been reflecting on these very things as I write my blog.
I was complimented on my work and Don said he was loving my environment so far. I asked questions about where I would fit within the company and was told it would be somewhere within the asset team. To my surprise however I was told that most of the 3D modelling was outsourced to a third party. I found this a shame because this is my favourite part of the process. For my career I would ideally like to be one of the people creating the 3D assets, so I will be continuing to apply for other opportunities in addition to this.
Whilst this may not lead to anything, I am confident that my work can stand up to scrutiny. I look forward to completing this project so that I can fully display it on my Artstation page. I only showed Don work-in-progress screenshots on the Polycount forums so I am eager to finish this and show it off properly.
I was complimented on my work and Don said he was loving my environment so far. I asked questions about where I would fit within the company and was told it would be somewhere within the asset team. To my surprise however I was told that most of the 3D modelling was outsourced to a third party. I found this a shame because this is my favourite part of the process. For my career I would ideally like to be one of the people creating the 3D assets, so I will be continuing to apply for other opportunities in addition to this.
Whilst this may not lead to anything, I am confident that my work can stand up to scrutiny. I look forward to completing this project so that I can fully display it on my Artstation page. I only showed Don work-in-progress screenshots on the Polycount forums so I am eager to finish this and show it off properly.
Tuesday, 24 July 2018
Week 10 - Tuesday: Additional Rooms
I have been creating additional rooms to flesh out the mansion environment that should create the illusion that the level is much larger than it actually is. I have done this by creating a long corridor that branches off from the main entrance hall and opens up into a larger space. When viewed from the stairway it creates a nice sense of scale.
I want to simulate light beams being projected through the curtains as I think this will further illustrate the time of day and make the player feel the heat and stuffiness of the building.
The curtains themselves were created using the cloth simulation similar to my carpet model. I have kept them quite low poly.
BARNWELL, J. (2017) Production Design for Screen: Visual Storytelling in Film and Television. New York: Bloomsbury Visual Arts.
The hallway viewed from the staircase.
Using my established criteria for defining interior space, I have tried to use the boundaries of this hallway to constrain the players movements, locking them in one direction as they proceed down the long corridor. I think this creates a sense of foreboding and I am looking forward to reflecting this in my promotional video, as I want the camera to glide slowly down the hallway as the music intensifies.
The hallway corridor which will be bridging the entrance hall and sitting room together.
The hallway has been constructed of smaller components that I will be repeating within Unreal Engine. I created these curtains with the intention that they could be seen from the exterior as well, hinting that the player can explore in that direction.
Modular curtains and windows.
I want to simulate light beams being projected through the curtains as I think this will further illustrate the time of day and make the player feel the heat and stuffiness of the building.
Here are my curtains textured within Substance Painter. I sneakily reused my wallpaper texture and recoloured it red.
The curtains themselves were created using the cloth simulation similar to my carpet model. I have kept them quite low poly.
BARNWELL, J. (2017) Production Design for Screen: Visual Storytelling in Film and Television. New York: Bloomsbury Visual Arts.
Tuesday, 17 July 2018
Week 9 - Tuesday: Roof Damage
Days of War map Carentan.
Bush Park, Detroit.
A derelict house in Ireland.
One element that I really like across all of these images is the large holes in the roofs revealing the scaffolding underneath.
I decided this would be perfect to add to my scene because the roof takes up such a large space in the environment but is an almost featureless element. Adding some variation like holes and broken tiles will really help to break up the flat surface.
I started by cutting out a hole in the geometry of my roof in 3DS Max and then built some exposed wooden planks that would fit in the holes:
Wooden scaffolding that I created in 3DS Max and then textured in Substance Painter. I tried to make the wood look as old and warped as possible.
I created a few planks and then pieced them together into a pattern that I could repeat. I created a wooden plank texture in Substance Painter and then exported the pieces into Unreal Engine.
Here you can see the wooden planks repeated a few times in Unreal Engine. They have helped to break up the otherwise simple roof elements.
I am going to add similar holes across the roof and perhaps even some broken windows. I am aiming to make the exterior scene instantly tell the player everything they need to know about the state of the mansion inside.
Front view of my roof debris.
ALLEN, K. (2005), Derelict house at Raw [Online Image]. Available at: https://www.geograph.org.uk/photo/76559 [Accessed: 16/07/2018].
FERNANDEZ, M. (2012), Detroit o el atractivo de una ciudad hundida [Online Image]. Available at: https://www.yorokobu.es/detroit-o-el-atractivo-de-una-ciudad-hundida/ [Accessed: 16/07/2018].
RANSON, M. (2017), Days of War map Carentan [Online Image]. Available at: https://www.artstation.com/artwork/OVB6y [Accessed: 15/07/2018].
Tuesday, 10 July 2018
Week 8 - Tuesday: Applying Mise-en-scène to my Game Environment
Over the past few weeks I have been better acclimating myself with the concept of mise-en-scène. Whilst the expression is mainly used to describe the design aspects of a film production, I believe the visual storytelling philosophy covered by mise-en-scène is equally applicable to the realm of video games. I have been reading two books on the subject from different authors which I believe have helped focus the visual design of my major project.
The first book I read from author Jane Barnwell titled “Production Design for Screen: Visual Storytelling in Film and Television”, gave me an effective new methodology for evaluating the set design in films (although I intend to apply this methodology to the visual design of game environments). The author has separated the set designers work into five distinct areas of analysis, each of which is given its own chapter.
Below I have broken down the five categories from the book and extrapolated some questions from them that I can then ask myself to help evaluate the design of my environment. They are as follows:
I believe so far my “set decoration” has done well in conveying the personality and character of the previous owner. I have populated the environment with ornate objects that speak of an older time when hand crafted objects were far more valued. The classical design of the furniture and main stairway emphasise the wealth of the mansions former occupant. I want to illicit a sense of intimidation as the player explores the mansion and I believe classical architecture does this well.
My use of colour on the other hand has been rather weak. I didn’t give much consideration to this aspect and the interior in particular feels much too washed out. I chose to keep my colour palette in line as much as I could with images of real abandoned homes that I have studied online, however this has resulted in a very plain looking scene. I would like to improve this element as well as my lighting, as it isn’t telling the player anything about the story. Originally I wanted the scene to be set at twilight as a visual metaphor for the sun setting over this once prosperous home, but I think this is an element that will need to be exaggerated. After all video games are a visual medium and they take on an almost “hyper-realism” where everything is a little more extreme than it is in real life.
The second book I read by Jean Whitehead titled “Creating Interior Atmosphere: Mise-en-scène and Interior Design”, highlighted to me the importance of taking advantage of my medium and using each element of mise-en-scène that I have control over to convey the story or message. Whitehead mentions that the use of distinctive visuals themselves can be the primary means in which a director conveys a story. In my case I would like to use the mise-en-scène to literally be the only method of storytelling in my game. Therefore I have decided to exaggerate the visuals of my abandoned mansion and really show off the state of ruin it has fallen into.
To do this I think I will need to add more debris and decay to all of my assets that populate the scene. I intend to study some other environments from games and analyse how they have used mise-en-scène to amplify the storytelling.
BARNWELL, J. (2017) Production Design for Screen: Visual Storytelling in Film and Television. New York: Bloomsbury Visual Arts.
WHITEHEAD, J. (2017) Creating Interior Atmosphere: Mise-en-scène and Interior Design. New York: Bloomsbury Visual Arts.
The first book I read from author Jane Barnwell titled “Production Design for Screen: Visual Storytelling in Film and Television”, gave me an effective new methodology for evaluating the set design in films (although I intend to apply this methodology to the visual design of game environments). The author has separated the set designers work into five distinct areas of analysis, each of which is given its own chapter.
Below I have broken down the five categories from the book and extrapolated some questions from them that I can then ask myself to help evaluate the design of my environment. They are as follows:
- Space – How have I used this to convey the size, scale and geography of the location to the player?
- In and Out. (Or Interior and Exterior) – How does the look of the environment change between the exterior locations to the interiors scenes? Are they all lit in the same way? What are the boundaries of the interior, and do they constrain the player’s actions in any way and can you use this to create an emotion or atmosphere?
- Light – What are the light sources and their position within the environment? Are they a certain colour and does this convey any character or story elements to the player? Have you used the light to illicit any emotions?
- Colour – Have you chosen a specific colour palette and ask yourself what the intention of this was? What is the emotional colour of the scene? Have you used the colour red anywhere and if so, does it denote anything important?
- Set Decoration – Has this been used to explain the character of the person who resides in this location? What period and style have you chosen and is it consistent with the story?
I believe so far my “set decoration” has done well in conveying the personality and character of the previous owner. I have populated the environment with ornate objects that speak of an older time when hand crafted objects were far more valued. The classical design of the furniture and main stairway emphasise the wealth of the mansions former occupant. I want to illicit a sense of intimidation as the player explores the mansion and I believe classical architecture does this well.
My use of colour on the other hand has been rather weak. I didn’t give much consideration to this aspect and the interior in particular feels much too washed out. I chose to keep my colour palette in line as much as I could with images of real abandoned homes that I have studied online, however this has resulted in a very plain looking scene. I would like to improve this element as well as my lighting, as it isn’t telling the player anything about the story. Originally I wanted the scene to be set at twilight as a visual metaphor for the sun setting over this once prosperous home, but I think this is an element that will need to be exaggerated. After all video games are a visual medium and they take on an almost “hyper-realism” where everything is a little more extreme than it is in real life.
The second book I read by Jean Whitehead titled “Creating Interior Atmosphere: Mise-en-scène and Interior Design”, highlighted to me the importance of taking advantage of my medium and using each element of mise-en-scène that I have control over to convey the story or message. Whitehead mentions that the use of distinctive visuals themselves can be the primary means in which a director conveys a story. In my case I would like to use the mise-en-scène to literally be the only method of storytelling in my game. Therefore I have decided to exaggerate the visuals of my abandoned mansion and really show off the state of ruin it has fallen into.
To do this I think I will need to add more debris and decay to all of my assets that populate the scene. I intend to study some other environments from games and analyse how they have used mise-en-scène to amplify the storytelling.
BARNWELL, J. (2017) Production Design for Screen: Visual Storytelling in Film and Television. New York: Bloomsbury Visual Arts.
WHITEHEAD, J. (2017) Creating Interior Atmosphere: Mise-en-scène and Interior Design. New York: Bloomsbury Visual Arts.
Tuesday, 3 July 2018
Week 7 - Tuesday: Bringing the Exterior into Unreal Engine
I have begun bringing the exterior of my environment into Unreal Engine. The majority of the assets all use either the brick material that I created or the grey limestone for the base. There are some elements that will require unique materials such as the triangular roof pediment.
You can see how I have applied the brick material to the walls. I have used parallax occlusion mapping to give them a bit of depth. I will be adding grime and other decals to the bricks to make it look less repetitive.
The environment is feeling very sterile and empty at the moment. I've decided to strip out all the lighting and placed a neutral light source in the scene, so that I can get a good sense of how all the materials will look without interference from strong contrasting light.
As you can see in these images there are still a lot of things that need to be brought into the engine. I am currently working on the roof at the moment. It is a high priority of mine to make it look as good as possible as it covers such a large area of the mansion.
Creating a Custom Roof Material
I have started to create a seamless roof material in much the same way that I created my bricks. I found this to be a good technique when creating my brick material because using real geometry lets you easily generate height maps, and these were very effective with parallax occlusion mapping.
Below you can see how I have lined up the tiles on a 2048 x 2048 plane so that the pattern repeats evenly:
I've angled the tiles so that there will be some depth when it comes to the parallax occlussion mapping:
Here is the texture as it appears in Substance Painter:
I've baked the geometry onto the texture and now I need to hook it up in Unreal Engine. Once I have got the basic materials set up within my scene, I'm going to rebuild the lighting and do some experimentation to get everything looking the way I imagine.
The exterior face of the mansion in Unreal Engine.
You can see how I have applied the brick material to the walls. I have used parallax occlusion mapping to give them a bit of depth. I will be adding grime and other decals to the bricks to make it look less repetitive.
Close up of my brick material on the walls of the mansion.
The environment is feeling very sterile and empty at the moment. I've decided to strip out all the lighting and placed a neutral light source in the scene, so that I can get a good sense of how all the materials will look without interference from strong contrasting light.
As you can see in these images there are still a lot of things that need to be brought into the engine. I am currently working on the roof at the moment. It is a high priority of mine to make it look as good as possible as it covers such a large area of the mansion.
Creating a Custom Roof Material
I have started to create a seamless roof material in much the same way that I created my bricks. I found this to be a good technique when creating my brick material because using real geometry lets you easily generate height maps, and these were very effective with parallax occlusion mapping.
Below you can see how I have lined up the tiles on a 2048 x 2048 plane so that the pattern repeats evenly:
My roof tiles aligned to a 2048 x 2048 plane for easy texture tiling.
I've angled the tiles so that there will be some depth when it comes to the parallax occlussion mapping:
You can see how I have angled the tiles so that I get some depth with the height maps for the parallax occlusion mapping.
Here is the texture as it appears in Substance Painter:
The roof tile texture in Substance Painter.
I've baked the geometry onto the texture and now I need to hook it up in Unreal Engine. Once I have got the basic materials set up within my scene, I'm going to rebuild the lighting and do some experimentation to get everything looking the way I imagine.
Tuesday, 26 June 2018
Week 6 - Tuesday: Career Planning
After the visit to Codemasters and Rebellion game studios I have made use of Aardvark swift to help send out my CV to companies and apply to some environment artist positions. I am not picky about where I work, but rather that the job role suits me.
As of today I have only posted one game-ready prop on my Arstation page and feel that my portfolio isn't really good enough to land me a job if I apply for work.
My environment is still far from completion but I have brought in some of the finished assets. I will be working on scene composition as this is something that was brought up in a review of my hangar bay scene at the Rewind visit.
As of today I have only posted one game-ready prop on my Arstation page and feel that my portfolio isn't really good enough to land me a job if I apply for work.
My armchair props next to the fireplace I have modelled.
My environment is still far from completion but I have brought in some of the finished assets. I will be working on scene composition as this is something that was brought up in a review of my hangar bay scene at the Rewind visit.
The completed assets within my environment
Ideally I would like to have some shots of my mansion on my Artstation page whilst I apply for jobs, but failing that I think the inclusion of these assets will help bolster my portfolio until then.
Tuesday, 19 June 2018
Week 5 - Tuesday: Props Armchair
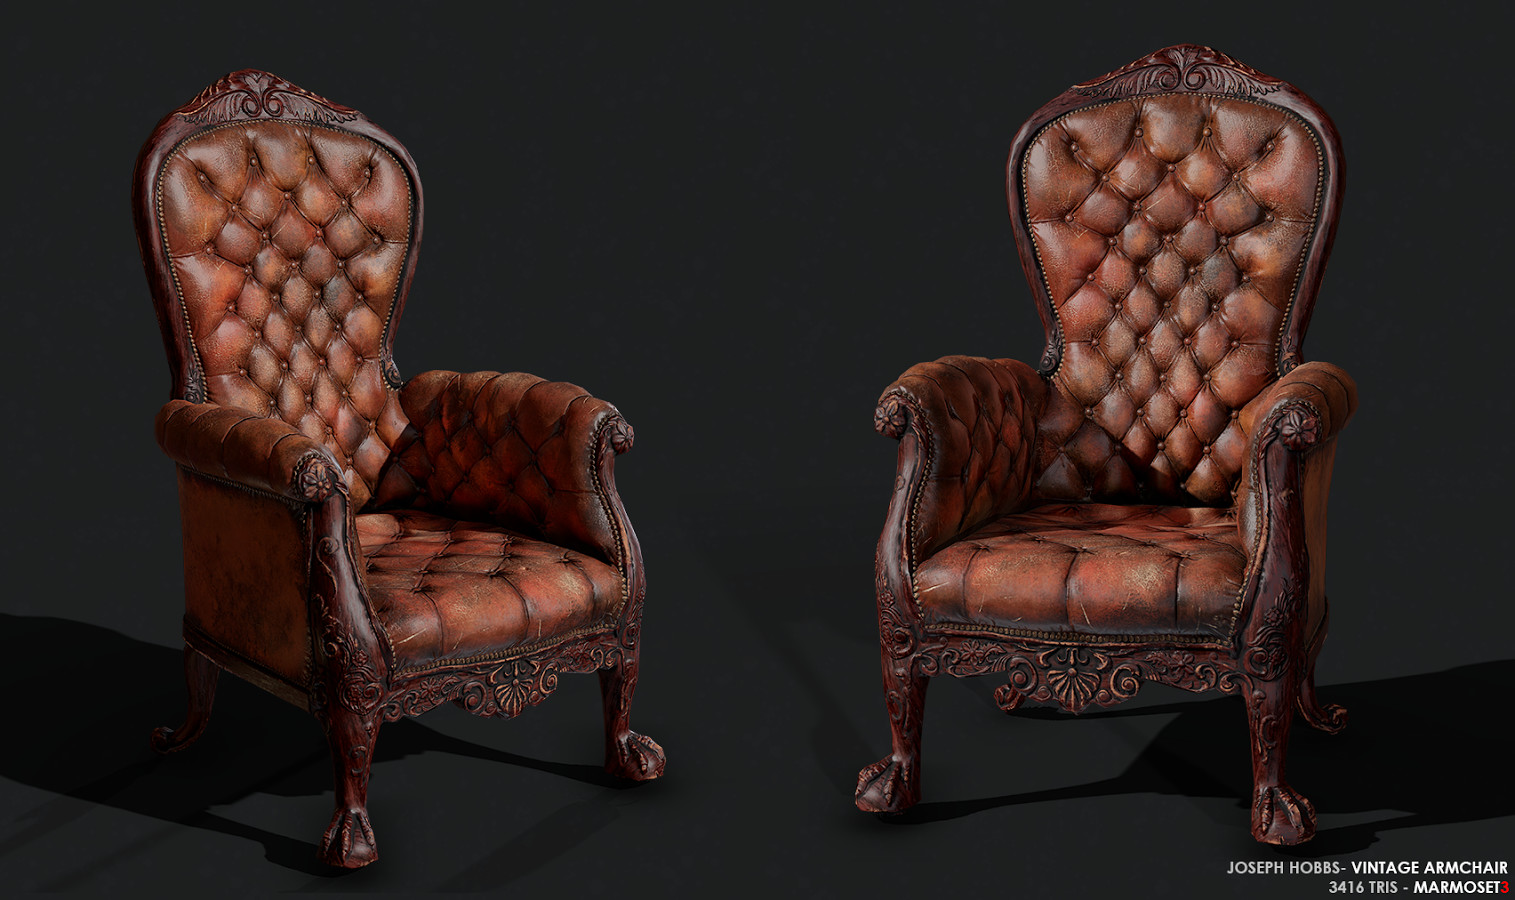
Today I completed a high poly prop for my mansion environment. I was inspired by the artwork of Joseph Hobbs a former student in the year before me. His Artstation portfolio is of a very high quality and his is the level that I am trying to reach by the end of this year. I was impressed by an armchair model which he had created, and wanted to test myself and see if I could create one of my own.
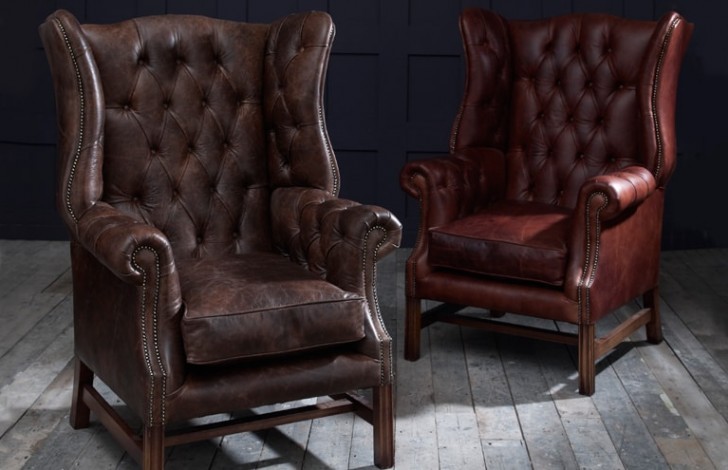
I wanted mine to have a more contemporary feel and finally settled on a design that I liked, this leather chesterfield armchair:
I created a high poly model in 3DS max and manually added creases to areas where I thought the surface should be taut. I had a Turbo Smooth modifier applied to the model which I toggled on and off to check whether the creases looked correct:
I also created some renders of the high poly model to add to my portfolio which you can see below:
Once the high poly model was completed, I created a low poly counterpart ready for surface transfer in Substance Painter. Normally I tend to be as stingy as possible when it comes to the amount of polygons I use for the low poly model. This has resulted in some ugly silhouettes for my past assets however and I wanted to avoid that this time, so I used more polygons on the edges of the armchair to make it look less jagged:
To avoid the issue of incorrect details projecting onto unwanted surfaces, I made sure to explode both the high poly and low poly models when I exported them into Substance Painter:
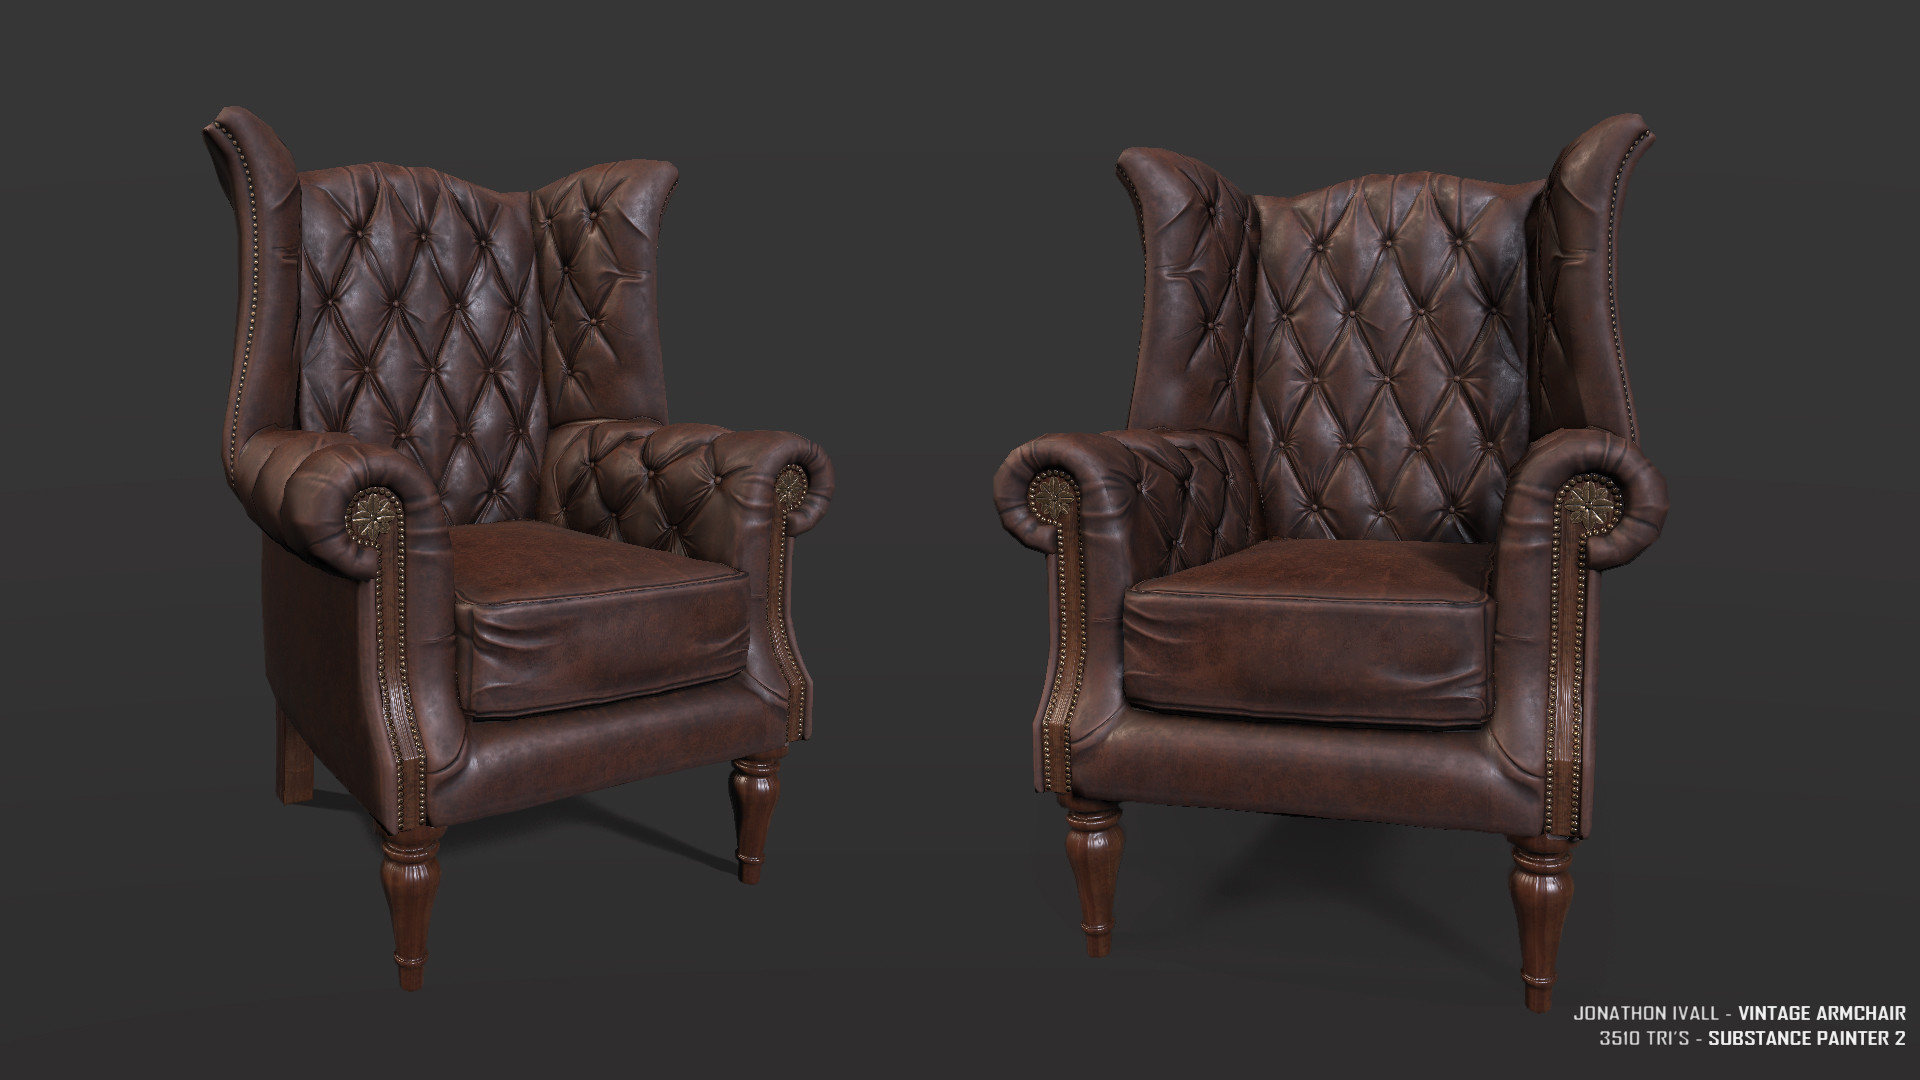
Below you can see the fully textured model as seen in Substance Painter:
The completed model is 3510 Tri's in total:
Overall I am very pleased with this piece as I feel individual assets are something that was missing in my portfolio. Whilst I am pleased with how the model turned out, I think that had I sculpted the high poly version in ZBrush instead of using 3DS Max, it could have looked better. Joseph used ZBrush to create the details for his model and I feel because of this, he was able to achieve a higher level of detail and fidelity.
My modelling process is an area that I would like to improve on as I have a lot of ornate assets left to model and not a lot of time to do so. Whilst I acknowledge that ZBrush would likely be a better tool to use for this purpose, I don't want to risk investing the time into learning to use it like a professional. I feel that any work I create with it now could end up being sub-par due to my inexperience with the program. As this is my stand out project, I am going to stick with what I know in terms of 3D modelling for now. However it is clear to me that ZBrush is the way to go for high poly details both in terms of time and quality. I spent a lot of time moving individual vertices of my model around to make the creases for the chair, when I could have just sculpted those details straight onto the model in ZBrush.
HOBBS, J. (2017), Vintage Armchair [Online Image]. Available at: https://www.artstation.com/artwork/E0kL8 [Accessed: 19/06/2018].
THE CHESTERFIELD COMPANY (2018), Manchester Vintage Leather Fireside Armchairk [Online Image]. Available at: https://www.thechesterfieldcompany.com/leather-armchairs/manchester-vintage-leather-fireside-armchair/ [Accessed: 19/06/2018].
The armchair model created by Joseph Hobbs.
I wanted mine to have a more contemporary feel and finally settled on a design that I liked, this leather chesterfield armchair:
I created a high poly model in 3DS max and manually added creases to areas where I thought the surface should be taut. I had a Turbo Smooth modifier applied to the model which I toggled on and off to check whether the creases looked correct:
Toggling between smoothed and unsmoothed versions of the model.
I also created some renders of the high poly model to add to my portfolio which you can see below:
Rendered images of the high poly armchair.
Once the high poly model was completed, I created a low poly counterpart ready for surface transfer in Substance Painter. Normally I tend to be as stingy as possible when it comes to the amount of polygons I use for the low poly model. This has resulted in some ugly silhouettes for my past assets however and I wanted to avoid that this time, so I used more polygons on the edges of the armchair to make it look less jagged:
The high poly armchair next to the low poly model.
To avoid the issue of incorrect details projecting onto unwanted surfaces, I made sure to explode both the high poly and low poly models when I exported them into Substance Painter:
The exploded armchair model ready to be taken into Substance Painter for texturing.
Below you can see the fully textured model as seen in Substance Painter:
This is the portfolio piece that I will be adding to my Artstation page.
The completed model is 3510 Tri's in total:
I have included a wireframe shot in my portfolio to show employers that I can surface transfer properly.
Overall I am very pleased with this piece as I feel individual assets are something that was missing in my portfolio. Whilst I am pleased with how the model turned out, I think that had I sculpted the high poly version in ZBrush instead of using 3DS Max, it could have looked better. Joseph used ZBrush to create the details for his model and I feel because of this, he was able to achieve a higher level of detail and fidelity.
My modelling process is an area that I would like to improve on as I have a lot of ornate assets left to model and not a lot of time to do so. Whilst I acknowledge that ZBrush would likely be a better tool to use for this purpose, I don't want to risk investing the time into learning to use it like a professional. I feel that any work I create with it now could end up being sub-par due to my inexperience with the program. As this is my stand out project, I am going to stick with what I know in terms of 3D modelling for now. However it is clear to me that ZBrush is the way to go for high poly details both in terms of time and quality. I spent a lot of time moving individual vertices of my model around to make the creases for the chair, when I could have just sculpted those details straight onto the model in ZBrush.
HOBBS, J. (2017), Vintage Armchair [Online Image]. Available at: https://www.artstation.com/artwork/E0kL8 [Accessed: 19/06/2018].
THE CHESTERFIELD COMPANY (2018), Manchester Vintage Leather Fireside Armchairk [Online Image]. Available at: https://www.thechesterfieldcompany.com/leather-armchairs/manchester-vintage-leather-fireside-armchair/ [Accessed: 19/06/2018].
Tuesday, 12 June 2018
Week 4 - Tuesday: Getting inspiration from Neil Blompkamp's Adam (2016)
Since making the switch from an architectural visualiser to 3D game artist, I have been trying to close the gap in the visual quality of my work between using rendered and real time imagery. I have been looking at some of the work that filmmakers have done using game engines to help put in perspective what is now achievable with real time graphics. I think this new perspective will help push me to achieve better results within my own work.
ADAM (2016) is a series of ongoing short films from director Neil Blompkamp and the VFX company Oats Studios. These films are a noteworthy example of the forefront of the industry because they are rendered entirely in real time using the Unity game engine. The first short was showcased at the Game Developers Conference in 2016 and showcased the high graphical quality that game engines were able to achieve.
From an interview in 2017 with the Verge website, Oats Studios explained how they used the Unity game engine to not only create the films visuals, but also change their approach to the filmmaking process. In the article Chris Harvey, Oats Studios VFX supervisor explains that the main appeal of using real-time rendering was that it let the filmmakers make adjustments to the film on the spot. “Literally, you could put a hat [on Adam], hit play, and watch the film with that.”
The director Neil Blomkamp explains that with Unity he was able to make shot adjustments immediately stating that the team were easily able to change the lighting of the film without the need for reshooting the scene at a different time of day.
I believe films like Adam are revolutionising the film making process and blurring the lines between video game and film development. I find this film particularly interesting as a case study because the success of films like this, could determine my future career path. As technology becomes increasingly integrated into the film pipeline, a working knowledge of game engines could become a necessity for artists wishing to enter the industry. As special effects become more game-engine centric I could find my skillset in high demand.
When it comes time to edit my promotional video I will be thinking of films like Adam as the benchmark of visual quality. I want to push myself to get the best I can from Unreal Engine and now that I have seen what is achievable, I have a high standard to reach for.
LIPTAK, A. (2017) How Neill Blomkamp and Unity are shaping the future of filmmaking with Adam: The Mirror – The Verge [Online] Available from: https://www.theverge.com/2017/10/4/16409734/unity-neill-blomkamp-oats-studios-mirror-cinemachine-short-film [Accessed: 12/06/2018]
UNITY (2016) Unity GDC demo - Adam - Part I [Online Video] Available from: https://www.youtube.com/watch?v=44M7JsKqwow [Accessed: 12/06/2018]
ADAM (2016) is a series of ongoing short films from director Neil Blompkamp and the VFX company Oats Studios. These films are a noteworthy example of the forefront of the industry because they are rendered entirely in real time using the Unity game engine. The first short was showcased at the Game Developers Conference in 2016 and showcased the high graphical quality that game engines were able to achieve.
From an interview in 2017 with the Verge website, Oats Studios explained how they used the Unity game engine to not only create the films visuals, but also change their approach to the filmmaking process. In the article Chris Harvey, Oats Studios VFX supervisor explains that the main appeal of using real-time rendering was that it let the filmmakers make adjustments to the film on the spot. “Literally, you could put a hat [on Adam], hit play, and watch the film with that.”
The director Neil Blomkamp explains that with Unity he was able to make shot adjustments immediately stating that the team were easily able to change the lighting of the film without the need for reshooting the scene at a different time of day.
I believe films like Adam are revolutionising the film making process and blurring the lines between video game and film development. I find this film particularly interesting as a case study because the success of films like this, could determine my future career path. As technology becomes increasingly integrated into the film pipeline, a working knowledge of game engines could become a necessity for artists wishing to enter the industry. As special effects become more game-engine centric I could find my skillset in high demand.
When it comes time to edit my promotional video I will be thinking of films like Adam as the benchmark of visual quality. I want to push myself to get the best I can from Unreal Engine and now that I have seen what is achievable, I have a high standard to reach for.
LIPTAK, A. (2017) How Neill Blomkamp and Unity are shaping the future of filmmaking with Adam: The Mirror – The Verge [Online] Available from: https://www.theverge.com/2017/10/4/16409734/unity-neill-blomkamp-oats-studios-mirror-cinemachine-short-film [Accessed: 12/06/2018]
UNITY (2016) Unity GDC demo - Adam - Part I [Online Video] Available from: https://www.youtube.com/watch?v=44M7JsKqwow [Accessed: 12/06/2018]
Tuesday, 5 June 2018
Week 3 - Tuesday: Completed Entrance Hall
I have finally completed the modeling for the entrance hall area. I have created a render in 3DS Max and hidden some of the walls so you can see inside better:
The next phase will be to UV map some of the more complicated features and ensure that everything goes into the engine correctly.
With the entrance hall area I have tried to conform to the requirements of Unreal Engine 4. As such when I bring this geometry into the engine, I will need to make sure that the elements are brought in efficiently. To illustrate what I mean, I have taken the time to break down this area into how I want to bring the assets into the engine. By doing this I hope to ensure that my assets are fit for purpose within Unreal Engine, making it easier for me to work with all of the 3D elements that I will be using.
I have categorised my assets into three types:
The majority of the surfaces in the entrance hall are wooden, so I already have my material instance setup to make the texturing process quick. The next task will be to ensure that everything is imported into the engine correctly so that I can finish the first room of my environment.
A render of my entrance hall interior.
The next phase will be to UV map some of the more complicated features and ensure that everything goes into the engine correctly.
With the entrance hall area I have tried to conform to the requirements of Unreal Engine 4. As such when I bring this geometry into the engine, I will need to make sure that the elements are brought in efficiently. To illustrate what I mean, I have taken the time to break down this area into how I want to bring the assets into the engine. By doing this I hope to ensure that my assets are fit for purpose within Unreal Engine, making it easier for me to work with all of the 3D elements that I will be using.
A breakdown I created to help me bring my assets into Unreal Engine.
I have categorised my assets into three types:
- Individual assets: These are the models that will come into the engine as separate entities. For example I am keeping the bannister posts individual assets because it's easier to position them without error in 3DS Max first.
- Repeated assets: These are models that I can easily repeat in Unreal Engine without error. I will only import one of this type and then position it repeatedly in the engine.
- Single asset: This represents a complex set of models that I will be importing into the engine as a single asset for easy placement.
The majority of the surfaces in the entrance hall are wooden, so I already have my material instance setup to make the texturing process quick. The next task will be to ensure that everything is imported into the engine correctly so that I can finish the first room of my environment.
Tuesday, 29 May 2018
Week 2 - Tuesday: Mansion Exterior
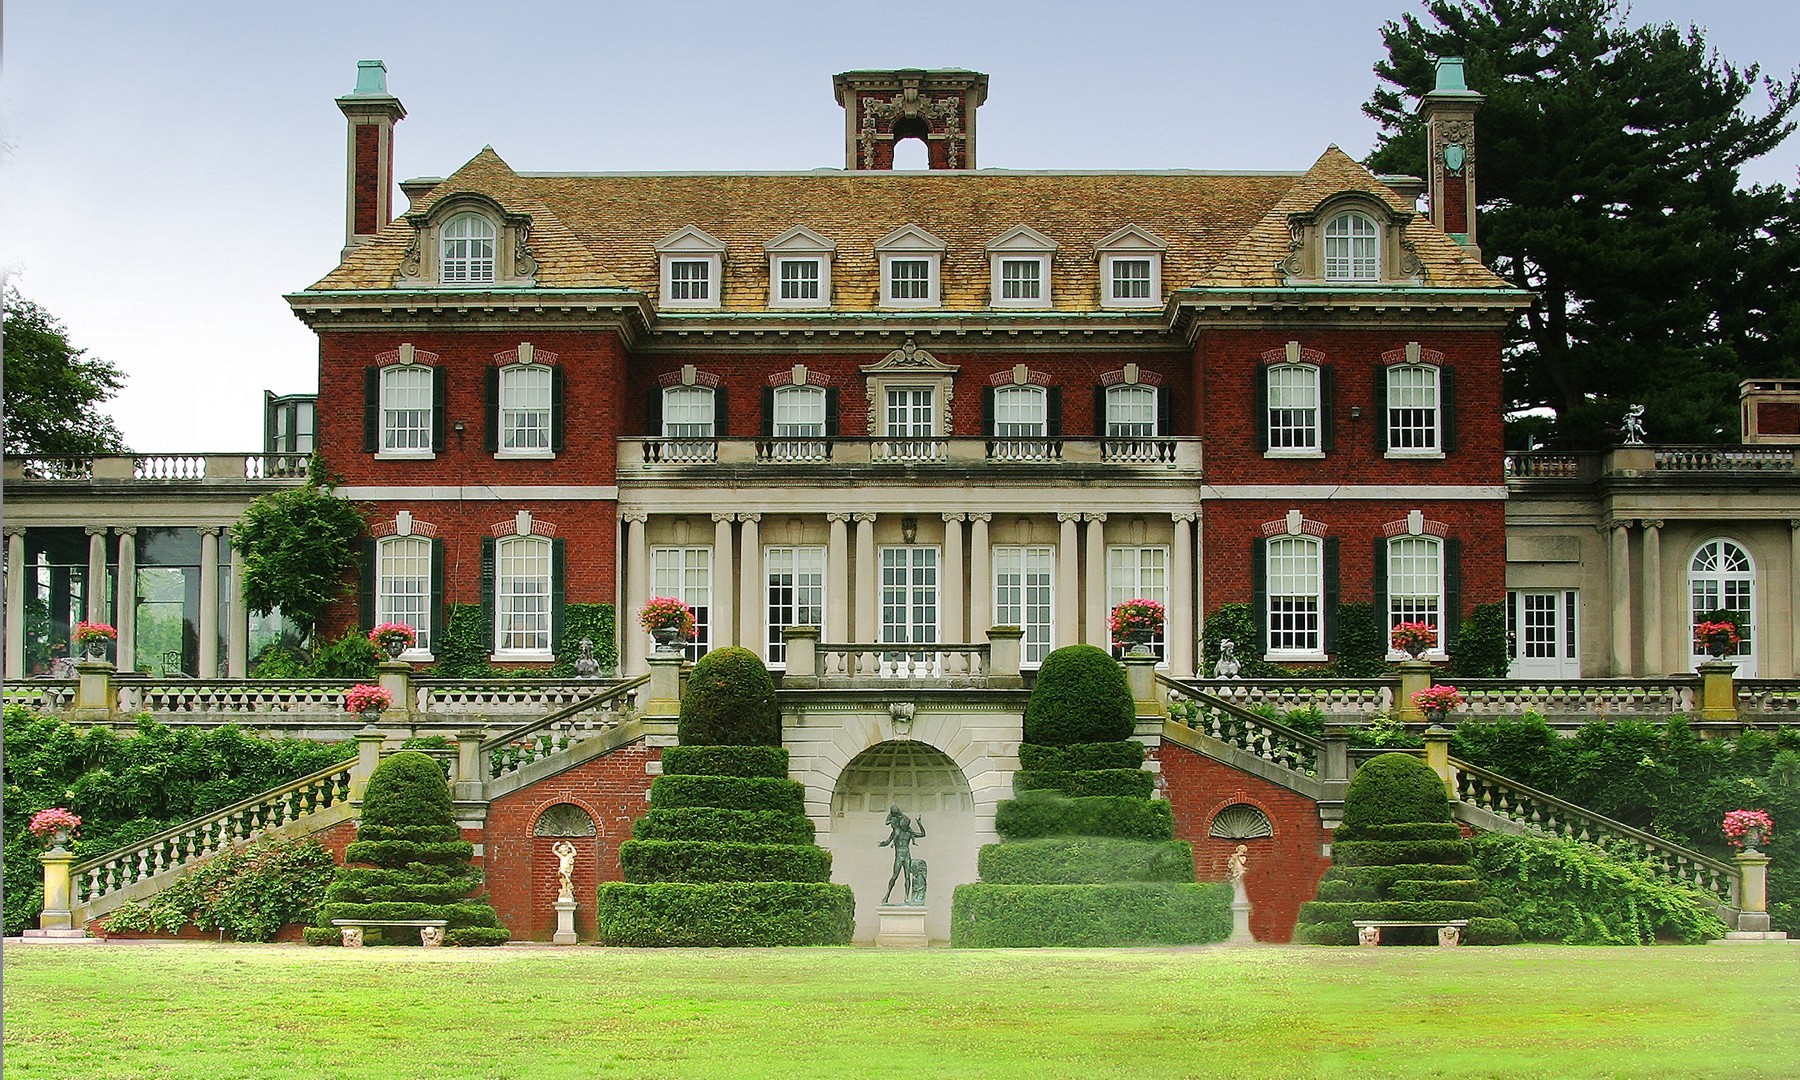
This week I have finalised the exterior face of the mansion environment. I am eager to include this part of the environment within my Unreal Engine scene, as I feel having an exterior provides players with a sense of place and scale rather than having them start inside the mansion.
Originally I wanted the exterior to look more like a traditional southern US mansion, however I felt this would limit the scale of the environment too much. Instead I drew inspiration from northen mansions as they convey a much stronger sense of grandeur and wealth.
Because the location of the abanoned mansion is left a secret to the player, I think I can fake some of the finer details. I want to make a strong environment piece first and foremost, so I am willing to overlook some historical inaccuracy.
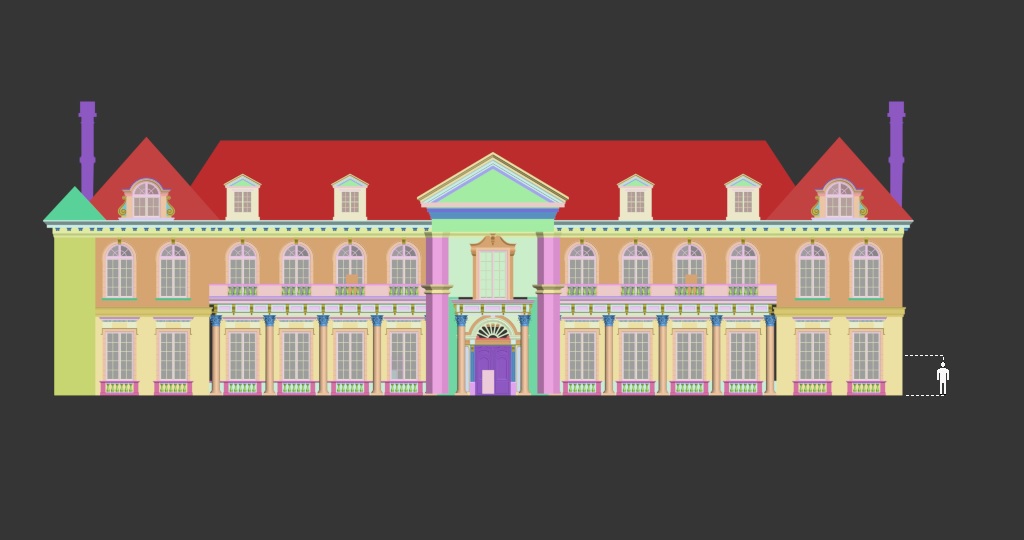
The building is mainly comprised of a modular wall piece that I created to fit within the grid spacing system of Unreal Engine:
You can see how the pieces fit together in the animation below:
I felt it was important to have the exterior finished during the modeling of the interior rooms so that I could make their dimensions match the outside in a realistic way. Now that I have the exterior completed, I will be finishing the interior scenes and texturing them first as this is where the bulk of my assets will be housed.
I will bring the exterior of the mansion into Unreal Engine once I am happy with how the interior rooms look in the game.
PATH THROUGH HISTORY. (2018), Old Westbury Gardens [Online Image]. Available at: https://paththroughhistory.iloveny.com/listings/Old-Westbury-Gardens/30477/#.W2h6k6LLxEo [Accessed: 29/05/2018].
Completed front section of the mansion exterior.
Originally I wanted the exterior to look more like a traditional southern US mansion, however I felt this would limit the scale of the environment too much. Instead I drew inspiration from northen mansions as they convey a much stronger sense of grandeur and wealth.
Old Westbury gardens a mansion in New York state. Built in 1906.
Because the location of the abanoned mansion is left a secret to the player, I think I can fake some of the finer details. I want to make a strong environment piece first and foremost, so I am willing to overlook some historical inaccuracy.
Front orthographic view with person for scale.
The building is mainly comprised of a modular wall piece that I created to fit within the grid spacing system of Unreal Engine:
Render of my modular exterior piece.
You can see how the pieces fit together in the animation below:
A demonstration of the modular pieces fitting seamlessly together.
I felt it was important to have the exterior finished during the modeling of the interior rooms so that I could make their dimensions match the outside in a realistic way. Now that I have the exterior completed, I will be finishing the interior scenes and texturing them first as this is where the bulk of my assets will be housed.
I will bring the exterior of the mansion into Unreal Engine once I am happy with how the interior rooms look in the game.
PATH THROUGH HISTORY. (2018), Old Westbury Gardens [Online Image]. Available at: https://paththroughhistory.iloveny.com/listings/Old-Westbury-Gardens/30477/#.W2h6k6LLxEo [Accessed: 29/05/2018].
Tuesday, 22 May 2018
Week 1 - Tuesday: Material Setup
When it comes to
creating materials for my 3D assets, I usually do it entirely within Substance
Painter. In the past this was quite helpful as a lot of my assets were unique
and didn’t use the same material. This time however I am imagining a lot of my
assets to be made from a similar material such as wood or marble. However
because I am using custom normal maps per asset It becomes quite inefficient to
repeatedly save out multiple versions of the same wood material with the only
difference in some cases being the normal and ambient occlusion maps.
This new approach to UV layout was also very helpful because I knew that certain assets wouldn’t need to go into substance painter and could therefore have their UV islands be placed outside the radius of the UV mapping grid. I could also use this to prevent obvious texture repetition by moving the islands anywhere I wanted.
To do so would
require me duplicating the same material within Substance Painter and applying
it to different assets within the software, then baking the effects of the
normal value and ambient occlusion into the textures and then exporting them
out of Substance to be used as individual maps within Unreal Engine. I know that was quite a mouthful so please see
the diagrams I have drawn below that illustrate this workflow.
Step 1: Each asset will usually have a high poly equivalent.
Step 2: Using substance painter I can bake the details of the high poly normal object onto a texture and combine this with the diffuse texture to create the finished material.
Step 3: Once I am happy with the look of the material in Substance Painter I can export it out as three seperate texture maps for use within Unreal Engine.
Step 4: I can then load the maps into Unreal Engine and create an unreal engine material shader and apply it to the asset in the engine.
Step 5: I will then repeat this process for every asset in the environment until they all have unique materials.
Step 6: Once this process is complete, all the assets will have a unique material assigned to it which can be problematic if I need to change the look of a certain material across several assets.
Step 7: If I needed to change the diffuse texture of assets A-D, I would need to go back into the substance file for each material and then make the changes individually.
As you can see this
is a somewhat time consuming and inefficient workflow. I was about to continue
working again in this way when I encountered an error within Substance Painter
that prevented me from loading in the custom material I had just created onto a
new asset. My only option was to then re-create my custom material from scratch
onto the new asset, a process that took up precious time. I was frustrated but
nevertheless I had recreated the material and applied it successfully onto the
new asset. With that done I was about to apply my recreated material onto a
new asset when I was met with the same error!
Throughout my
previous projects I hadn’t come across this problem before and it illustrated to
me how inefficient and flimsy my material workflow has been up to this point.
I decided I had
to approach the problem in a new way that would minimise the amount of time
consuming busy work I would need for each asset. This is where Unreal Engine’s
material instances come into play.
Using Material
Instances:
In Unreal Engine you can create copies of a material that
when set up correctly, allow for certain attributes to be altered to add
variation to repeated materials. These are known as Material Instances. I spent
some time developing a workflow to quickly create multiple materials and after
some experimentation I believe I have a good system in place. Below I will
describe my process and the benefits I think this is going to bring to my production pipeline.
In this example my material instances all utilise the same
wood texture however I have enabled them to be hooked up with additional
texture maps that can greatly vary their appearance. This workflow requires
that I create custom normal maps and ambient occlusion maps within substance
painter per asset, and then hook them up into the material instance. See below
how I have used the same wood texture but have been able to add variation
through custom normal maps.
This is the generic wood material I created and applied to several assets in my scene. Let's say I want to add additional details to a specific set of objects, all I would have to do is create a material instance and change the normal map.
Here you can see the details have changed whilst the look of the wood remains consistent across all the assets.
I can even change the colour of the diffuse texture at once without individually selecting materials and changing attributes!
So far I have utilised the material instances within Unreal Engine to create
a variety of materials that all stem from a master material. This method has a
variety of benefits, firstly attributes that control the colour, roughness and
normal map intensity for example are no longer locked down to a single texture
map generated from Substance Painter. Meaning I can create instances of the
same material that can appear vastly different from one another.
For example, I could make the colour of one material a shade of red whilst the other is blue, or change how often a texture is tiled dependant on the individual material instance. Both materials will still use the same maps but I can tweak their attributes to add differentiation to them without needing to open up Substance Painter, change the material and re-export the texture maps (something that took me a considerable amount of time previously). Because the normal map remains static the material instance will not lose the appearance of detail.
Secondly because the materials are instanced, they require
less computational power making them more efficient in the scene. The Engine no
longer has to worry about calculating individual material shaders for different
objects, as the majority of materials are now derived from a master material.
This also has the benefit of keeping my project much cleaner as I won’t have
hundreds of near identical materials clogging up my scene.
And finally this method forced me to be more considerate
with UV mapping. I had to place a greater emphasis on my UV layout as each
asset is utilising the same master material. This means the direction the UV islands
face will need to correspond accordingly with each other. In the past this
wasn’t a big consideration for me as I would just align textures correctly in
Substance Painter, however I prefer this approach as it means the UV’s are now
consistent across all my assets. You can see the example below as to why this
was so important for my workflow.
The UV island faces need to align with eachother so that the wood grain is consistent across all assets.
This new approach to UV layout was also very helpful because I knew that certain assets wouldn’t need to go into substance painter and could therefore have their UV islands be placed outside the radius of the UV mapping grid. I could also use this to prevent obvious texture repetition by moving the islands anywhere I wanted.
So far I am pleased with the new direction I am taking with
material creation as I already feel that I am working more efficiently. Now previously I
had created some custom materials and instances straight in Unreal Engine but
hadn’t considered combining this method with the texture maps I had created in substance
painter before. It’s obvious to me now how inefficient my previous workflow was
and I feel like I should have realised this sooner during my previous projects. I
think I can attribute this to my "newness" of game engine pipelines and
using Substance Painter in general. Back then I think I was just pleased to get results at all. It’s interesting how encountering an error with the software caused me to rethink my
entire approach, and I’m thankful this happened early on as I could have
ended up wasting valuable time working harder, not smarter.
Subscribe to:
Posts (Atom)