The forefront of the video game industry can be identified by an array of different artefacts, individuals and processes. I think a good indicator of the forefront is when a technique, process or piece of software changes the way practitioners within the industry create their games. I believe Unreal Engine 4 is one such piece of software.
Throughout
this year I have been building my workflow around real time rendering
through Unreal Engine 4. As an environment artist I consider this an
essential piece of software because it is the primary method I use to
display my art. Real time graphics have offered me a new way to interact
with my work during production, giving me instant feedback to any
creative changes I make meaning I no longer have to wait for a render to finish before I can see
the final result of my work. It is largely for this reason that I
believe Unreal Engine in particular is at the forefront of not just the
games industry but across all areas of 3D visualisation.
Instead
of a static image displayed on screen, Unreal Engine offers artists
dynamic vantage points displayed in real time. If they find an issue
they can then make changes immediately with instant feedback. This is
great from a design perspective as artists no longer have to wait for
hours at a time to get a new rendering of a proposed change. This
emphasis on interaction has played a big part in design firms within the
architectural sector turning to real-time technology for visual
solutions. From the Unreal Engine blog, Ken Pimentel lists Italian
architectural firm Lissoni Associates and Neoscape, a creative agency
that focuses on design for real estate, as companies revolutionizing
their design process through interactive real-time graphics powered by
Unreal Engine. (Pimentel 2018).
Indeed,
my main reason for choosing to study at the University of Hertfordshire
was that my architecture company was looking to get into real time
visualisation using Unreal Engine, and I felt that there was a lot I
didn’t know about this field and I could see there were a lot of
benefits to using real time rendering. Because of these Unreal Engine’s
relevance at the forefront of the field of 3D visualisation is
constantly increasing. It has shifted its identity away from being
solely known as a tool for game development, to a legitimate means of
producing high end visualisations for numerous industries ranging from
film to architecture.
The
droid from the film Star Wars: Rogue One (2017) was rendered in real
time using Unreal Engine, a first for the industry. As real time
graphics displays are making it easier for film makers and artists to
receive instant feedback from creative decisions, costly render times
are also being negated. This coupled with the Engine’s unbeatable price
point of completely free, has solidified the software at the forefront
of 3D visualisation.
I
believe the adoption of Unreal Engine across the different industries
of the creative economy is Marshall Mcluhan’s concept of the Global
village in action. We are seeing the differences of software and
terminology across distinct fields becoming smaller and smaller. This
could ultimately change the way we perceive mediums such as film, games
and architecture, especially when they are driven by the same technology
and methodologies.
PIMENTEL, K. (2018) Moving Beyond the Image: Test Drive Your Visual Designs. [Online] Available at: https://www.unrealengine.com/en-US/blog/moving-beyond-the-image-test-drive-your-visual-designs [Accessed: 11/06/2018]
POLYGON. (2017). Star Wars: Rogue One’s best character was rendered in real time, a cinema first. Available at: https://www.polygon.com/2017/3/1/14777806/gdc-epic-rogue-one-star-wars-k2so
[Accessed: 11/06/2018]
Showing posts with label Week 1. Show all posts
Showing posts with label Week 1. Show all posts
Friday, 25 May 2018

Thursday, 24 May 2018
Week 1 - Thursday: Fireplace Asset
I have begun creating the first of what I hope will be many assets, an ornate fireplace for the mansion's entrance hall. Using hard surface transfer techniques within Substance Painter, I will be transferring a high poly fireplace onto a low poly equivalent to simulate detail. This will keep things optimised within Unreal Engine.
I started by looking at some designs of fireplaces in mansions.

I really love the elongated look of these as their sheer size makes them quite intimidating in appearance. This is a design aspect that I am interested in replicating throughout my scene, as I am aiming to create a sense of grandeur and scale that will be reflected in all the assets of the environment.
Below you can see the high poly model as seen in the 3DS Max viewport:

Front orthographic view:

Below you can see the inset hearth that I have treated as a seperate asset because it will be using a different material from the main body:


I created these ornate details within 3DS max. I took my time to make sure the topology was clean, however this was something I could have perhaps not stressed over, as much of these details would only be transferred over to the low poly model. In the future I will most likely reuse these details for other models rather than create more custom details.

Below you can see the low poly model of the fireplace:

I created the model and UV mapped it pretty quickly, however I did encounter a rather frustrating problem when it came to projecting the high poly details onto the model. I found that if certain parts of the model were close together, then Substance Painter would have trouble projecting details onto them. For example the details only meant for a particular surface would bleed onto the ones adjacent to it. To avoid this I had to seperate all the elements of the model and bake the details onto them individually. When this was done I had to bring all the seperate maps into photoshop and manually piece them back together. This took a REALLY long time and I'm trying to find an alternative to doing this for every asset with lots of overlapping details.
You can see how the asset looks so far in Unreal Engine below:

I started by looking at some designs of fireplaces in mansions.
I really love the elongated look of these as their sheer size makes them quite intimidating in appearance. This is a design aspect that I am interested in replicating throughout my scene, as I am aiming to create a sense of grandeur and scale that will be reflected in all the assets of the environment.
Below you can see the high poly model as seen in the 3DS Max viewport:

The lower portion of the mansion fireplace.
Front orthographic view:

Below you can see the inset hearth that I have treated as a seperate asset because it will be using a different material from the main body:

I also modelled some additional floral details to add some variety to the surface areas of the model:

I created these ornate details within 3DS max. I took my time to make sure the topology was clean, however this was something I could have perhaps not stressed over, as much of these details would only be transferred over to the low poly model. In the future I will most likely reuse these details for other models rather than create more custom details.

Below you can see the low poly model of the fireplace:

I created the model and UV mapped it pretty quickly, however I did encounter a rather frustrating problem when it came to projecting the high poly details onto the model. I found that if certain parts of the model were close together, then Substance Painter would have trouble projecting details onto them. For example the details only meant for a particular surface would bleed onto the ones adjacent to it. To avoid this I had to seperate all the elements of the model and bake the details onto them individually. When this was done I had to bring all the seperate maps into photoshop and manually piece them back together. This took a REALLY long time and I'm trying to find an alternative to doing this for every asset with lots of overlapping details.
You can see how the asset looks so far in Unreal Engine below:
Wednesday, 23 May 2018
Week 1 - Wednesday: Animation Expose
Today I watched the final year show of the animation, film
and game art students. I was extremely impressed with the quality of work that
was showcased today and I am both inspired and determined to meet the high
standards that they have displayed throughout the show. I was particularly
impressed with the cinematic for Kyros which was rendered entirely in Unreal
Engine. A large focus of my research throughout this year has been on the
viability of Unreal Engine as a legitimate tool for visualisation beyond video
games, so I was pleased to see such a great example of this with Kyros.
I also had the opportunity to talk to professionals from the industry and show them my work. Attending events and meeting professionals is something I have been aiming to improve on as I feel it is crucial to not only getting my name out there, but improving my craft by exposing my work to critique. I received some great feedback from people who have been in the game industry for years and I was given some advice about my portfolio presentation, as well as some elements to focus on such as displaying props and individual assets on my Artstation page.
I also had the opportunity to talk to professionals from the industry and show them my work. Attending events and meeting professionals is something I have been aiming to improve on as I feel it is crucial to not only getting my name out there, but improving my craft by exposing my work to critique. I received some great feedback from people who have been in the game industry for years and I was given some advice about my portfolio presentation, as well as some elements to focus on such as displaying props and individual assets on my Artstation page.
Overall the experince was a great inspiration and I am eager to get back to working on my project so that it can stand alongside some of the other great student projects the unversity has produced this year.
UNIVERSITY OF HERTFORDSHIRE (2018). Animation Exposé 2018. [Online Video]. May 23rd. Available from: https://www.youtube.com/watch?v=5a9sCTycaRU&t=20s. [Accessed: 23/05/2018].
Tuesday, 22 May 2018
Week 1 - Tuesday: Material Setup
When it comes to
creating materials for my 3D assets, I usually do it entirely within Substance
Painter. In the past this was quite helpful as a lot of my assets were unique
and didn’t use the same material. This time however I am imagining a lot of my
assets to be made from a similar material such as wood or marble. However
because I am using custom normal maps per asset It becomes quite inefficient to
repeatedly save out multiple versions of the same wood material with the only
difference in some cases being the normal and ambient occlusion maps.


This new approach to UV layout was also very helpful because I knew that certain assets wouldn’t need to go into substance painter and could therefore have their UV islands be placed outside the radius of the UV mapping grid. I could also use this to prevent obvious texture repetition by moving the islands anywhere I wanted.
To do so would
require me duplicating the same material within Substance Painter and applying
it to different assets within the software, then baking the effects of the
normal value and ambient occlusion into the textures and then exporting them
out of Substance to be used as individual maps within Unreal Engine. I know that was quite a mouthful so please see
the diagrams I have drawn below that illustrate this workflow.

Step 1: Each asset will usually have a high poly equivalent.

Step 2: Using substance painter I can bake the details of the high poly normal object onto a texture and combine this with the diffuse texture to create the finished material.

Step 3: Once I am happy with the look of the material in Substance Painter I can export it out as three seperate texture maps for use within Unreal Engine.

Step 4: I can then load the maps into Unreal Engine and create an unreal engine material shader and apply it to the asset in the engine.

Step 5: I will then repeat this process for every asset in the environment until they all have unique materials.

Step 6: Once this process is complete, all the assets will have a unique material assigned to it which can be problematic if I need to change the look of a certain material across several assets.

Step 7: If I needed to change the diffuse texture of assets A-D, I would need to go back into the substance file for each material and then make the changes individually.
As you can see this
is a somewhat time consuming and inefficient workflow. I was about to continue
working again in this way when I encountered an error within Substance Painter
that prevented me from loading in the custom material I had just created onto a
new asset. My only option was to then re-create my custom material from scratch
onto the new asset, a process that took up precious time. I was frustrated but
nevertheless I had recreated the material and applied it successfully onto the
new asset. With that done I was about to apply my recreated material onto a
new asset when I was met with the same error!
Throughout my
previous projects I hadn’t come across this problem before and it illustrated to
me how inefficient and flimsy my material workflow has been up to this point.
I decided I had
to approach the problem in a new way that would minimise the amount of time
consuming busy work I would need for each asset. This is where Unreal Engine’s
material instances come into play.
Using Material
Instances:
In Unreal Engine you can create copies of a material that
when set up correctly, allow for certain attributes to be altered to add
variation to repeated materials. These are known as Material Instances. I spent
some time developing a workflow to quickly create multiple materials and after
some experimentation I believe I have a good system in place. Below I will
describe my process and the benefits I think this is going to bring to my production pipeline.

Breakdown of my material instance.
In this example my material instances all utilise the same
wood texture however I have enabled them to be hooked up with additional
texture maps that can greatly vary their appearance. This workflow requires
that I create custom normal maps and ambient occlusion maps within substance
painter per asset, and then hook them up into the material instance. See below
how I have used the same wood texture but have been able to add variation
through custom normal maps.

This is the generic wood material I created and applied to several assets in my scene. Let's say I want to add additional details to a specific set of objects, all I would have to do is create a material instance and change the normal map.

Here you can see the details have changed whilst the look of the wood remains consistent across all the assets.
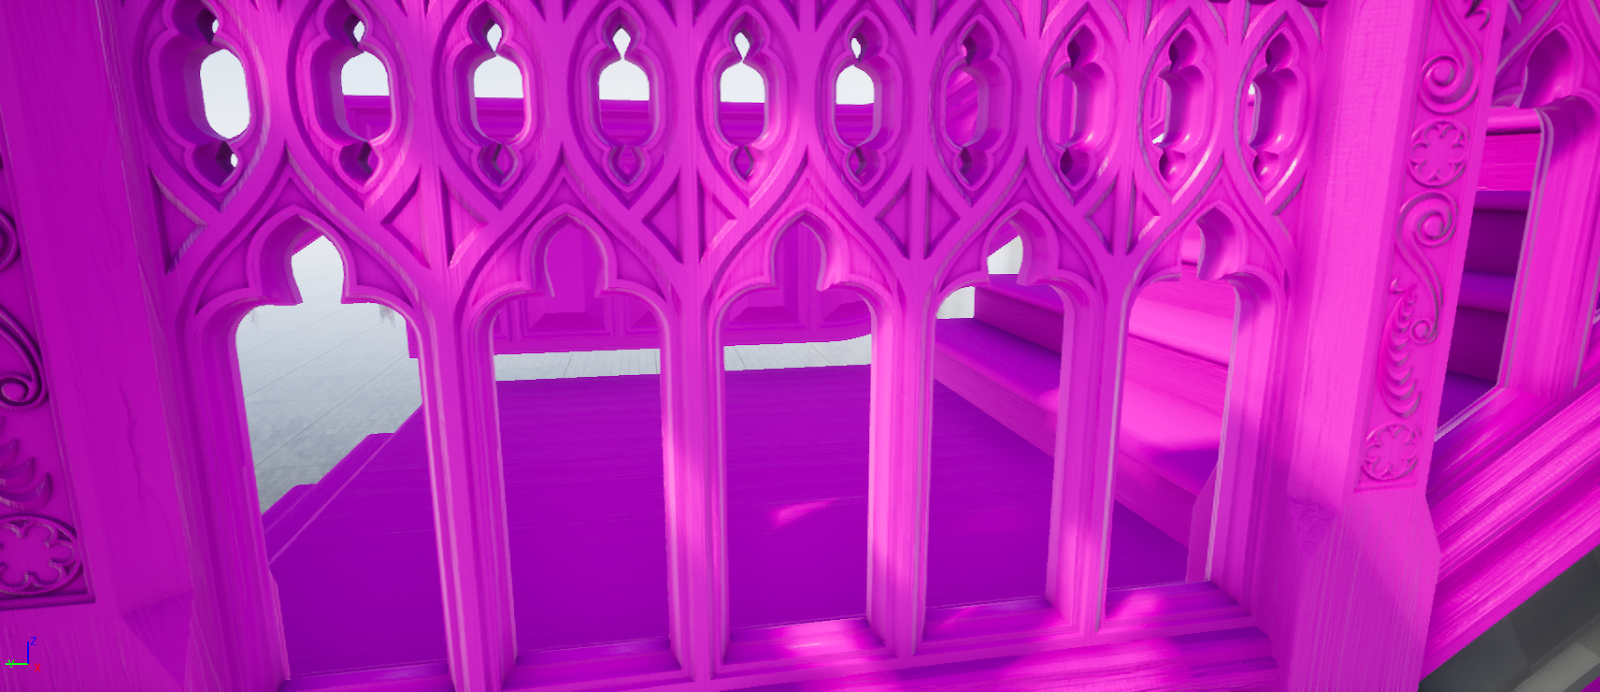
I can even change the colour of the diffuse texture at once without individually selecting materials and changing attributes!
So far I have utilised the material instances within Unreal Engine to create
a variety of materials that all stem from a master material. This method has a
variety of benefits, firstly attributes that control the colour, roughness and
normal map intensity for example are no longer locked down to a single texture
map generated from Substance Painter. Meaning I can create instances of the
same material that can appear vastly different from one another.
For example, I could make the colour of one material a shade of red whilst the other is blue, or change how often a texture is tiled dependant on the individual material instance. Both materials will still use the same maps but I can tweak their attributes to add differentiation to them without needing to open up Substance Painter, change the material and re-export the texture maps (something that took me a considerable amount of time previously). Because the normal map remains static the material instance will not lose the appearance of detail.
For example, I could make the colour of one material a shade of red whilst the other is blue, or change how often a texture is tiled dependant on the individual material instance. Both materials will still use the same maps but I can tweak their attributes to add differentiation to them without needing to open up Substance Painter, change the material and re-export the texture maps (something that took me a considerable amount of time previously). Because the normal map remains static the material instance will not lose the appearance of detail.
Secondly because the materials are instanced, they require
less computational power making them more efficient in the scene. The Engine no
longer has to worry about calculating individual material shaders for different
objects, as the majority of materials are now derived from a master material.
This also has the benefit of keeping my project much cleaner as I won’t have
hundreds of near identical materials clogging up my scene.
And finally this method forced me to be more considerate
with UV mapping. I had to place a greater emphasis on my UV layout as each
asset is utilising the same master material. This means the direction the UV islands
face will need to correspond accordingly with each other. In the past this
wasn’t a big consideration for me as I would just align textures correctly in
Substance Painter, however I prefer this approach as it means the UV’s are now
consistent across all my assets. You can see the example below as to why this
was so important for my workflow.

The UV island faces need to align with eachother so that the wood grain is consistent across all assets.
This new approach to UV layout was also very helpful because I knew that certain assets wouldn’t need to go into substance painter and could therefore have their UV islands be placed outside the radius of the UV mapping grid. I could also use this to prevent obvious texture repetition by moving the islands anywhere I wanted.
So far I am pleased with the new direction I am taking with
material creation as I already feel that I am working more efficiently. Now previously I
had created some custom materials and instances straight in Unreal Engine but
hadn’t considered combining this method with the texture maps I had created in substance
painter before. It’s obvious to me now how inefficient my previous workflow was
and I feel like I should have realised this sooner during my previous projects. I
think I can attribute this to my "newness" of game engine pipelines and
using Substance Painter in general. Back then I think I was just pleased to get results at all. It’s interesting how encountering an error with the software caused me to rethink my
entire approach, and I’m thankful this happened early on as I could have
ended up wasting valuable time working harder, not smarter.
Monday, 21 May 2018
Week 1 - Monday: Project Planning with an Updated Schedule
With the completion of my major study planning folder, I
have updated my project schedule Gantt chart. I have tried to keep this chart
as streamlined and easy to read as possible. I have broken down my schedule
into 13 weeks with each week being further organised into individual days. By
breaking the schedule down into sizeable chunks, I can easily keep track of
each day and assignment then cross them off as they are completed. By doing this
I will also be using this Gantt chart as my project calendar.

I have tried to give myself enough time in each area of production whilst keeping my chart easy to read and concise. I have intentionally tried to streamline this schedule so that there is no confusion. I feel this is the best approach for me, as I don’t feel as overwhelmed about the amount of work when it is visually condensed in this way.
I feel I have
set myself a realistic schedule which includes the timetabled tutorials and
symposium sessions as well as the weekends in which I will not have access to computer
rooms in the Film and Music building. Because of this I have tried to factor in
a buffer time for further development and problem solving as I will likely come
across unexpected production issues over the course of the module and may not
have access to the facilities I require throughout the full production.
As I am working
individually, I have built my project around the areas I am strongest in. This
means that I have tried to maximise the amount of time for 3D modeling and asset creation.
Subscribe to:
Posts (Atom)