Today I have finished editing my promotional video for my game environment. I did not want to explain the project verbally as I felt to do so would be antithetical to the aim of my project, which was to see if I could convey the story through the environment design. I believe I was successful in this regard and so I feel it is far more effectiveto let my environment to do the talking for me.
My finished promotional video.
To engage my audience I feel that leaving them asking questions will influence them to check out more of my work. If they are generally interested in what they have seen, they will take the next step and view my portfolio. I have tried to edit this video in such a way that it leaves the audience wanting to know moreand therebyopening up my youtube channel for active engagement where they can ask me questions about the project. Interaction between myself and my audience could ultimately lead to my work receiving a dedicated following.
Edit (15/08/2018)
I was told to add more information to my video so I have re-edited a second version and also made this available on my youtube channel:
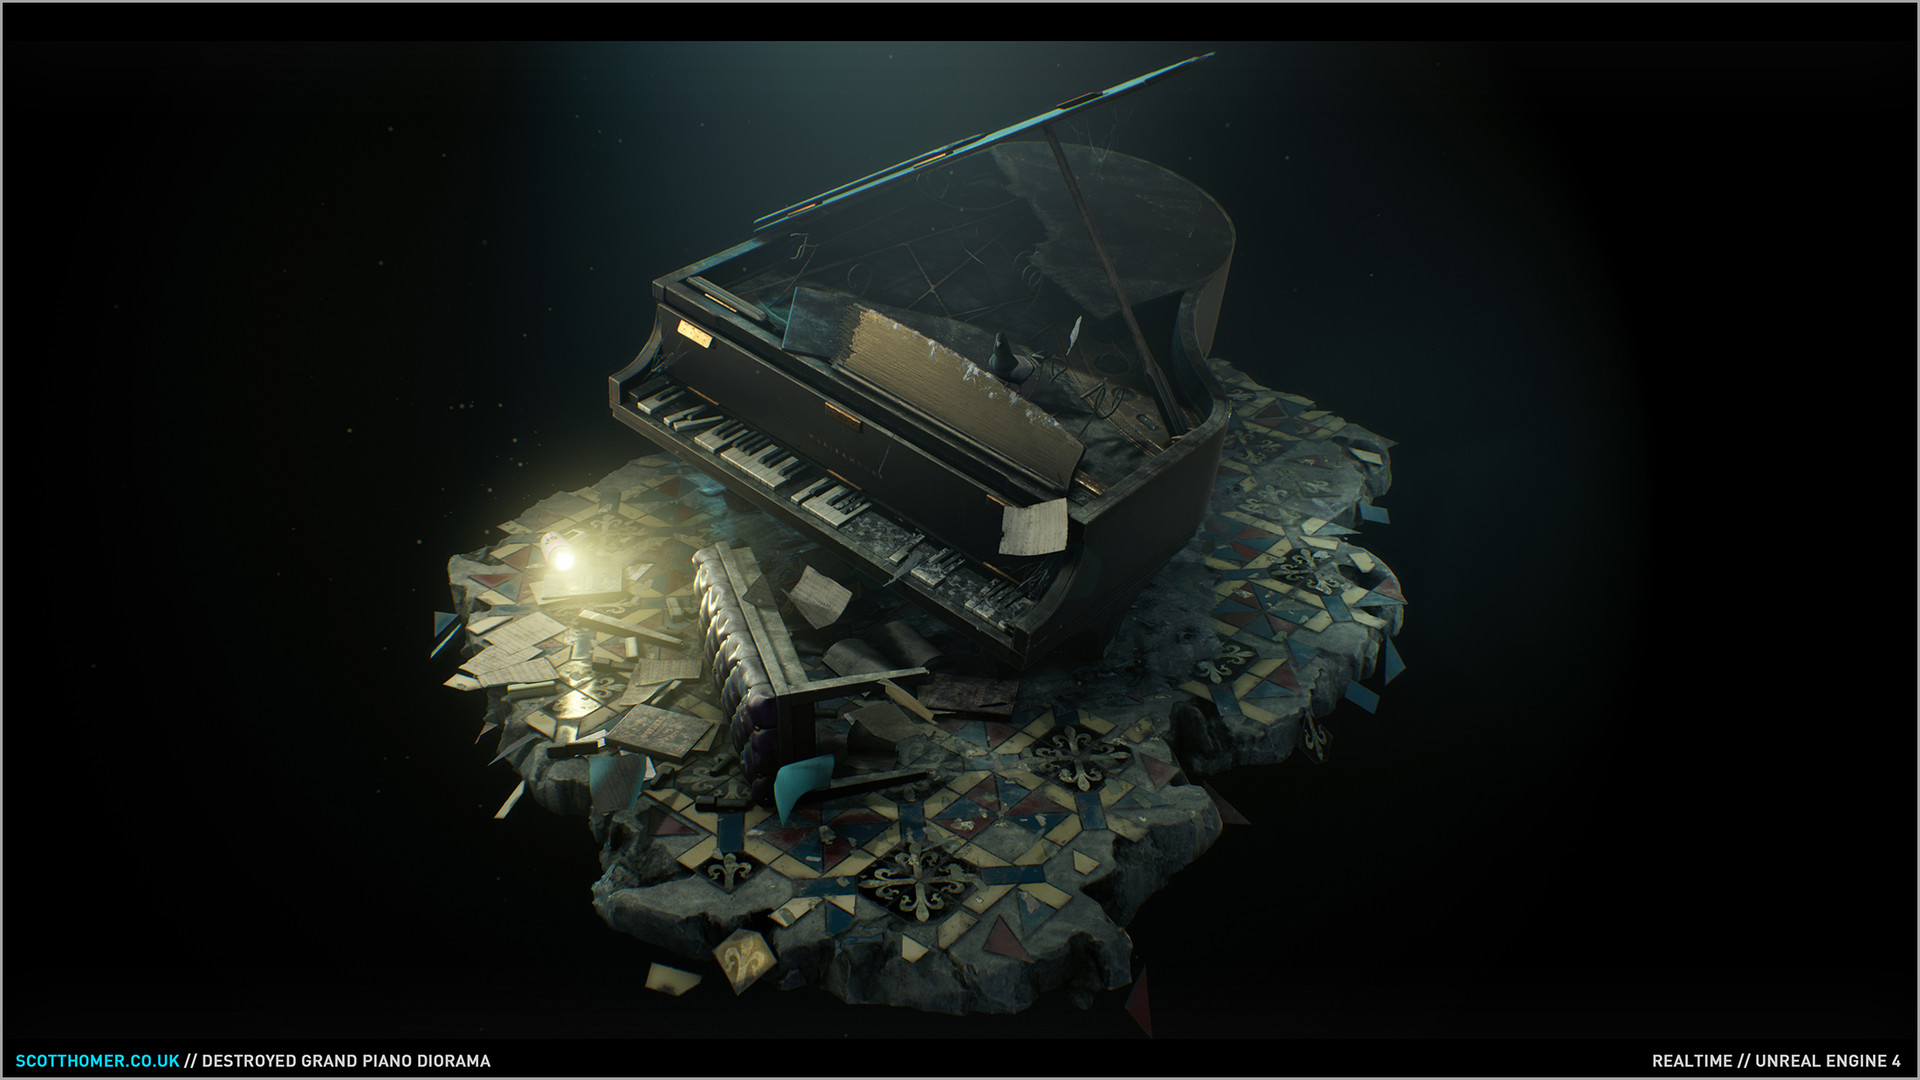
I am adding more props to my portfolio. I did say I wasn't going to create any further assets but I saw this piece by Epic Games artist Scott Homer on Artstation and I was completely inspired:
Scott Homer Destroyed Grand Piano (2017).
It was the beauty of the grand piano being completely destroyed that made me want to create one for myself. My Unreal Engine scene has been occuppied with calculating light bakes at the moment which has left me with not much else to do besides 3D modelling. I decided to spend this time creating another strong asset piece to include in my portfolio.
A grand piano I created in 3DS Max. The low poly model is in blue on the left.
It took me three days spread across doing lighting tests within Unreal Engine to finish the asset:
The finished portfolio piece.
I am going to be using this asset at the end of the hallway so that it gives the illusion there is much more to explore.
Today I have been creating decals designed to replicate the intricate vines growing on buildings like this:
Vines ensnaring a house.
Here is vine decal I created based on the image above.
A vine decal for use in Unreal Engine.
I created a 3D model and baked it onto a flat surface plane in Substance Painter:
The vine created in 3D.
The 3D vine on the plane ready to be baked into a texture.
Below you can see a larger surface area created using the same technique:
A larger vine texture I created to go on the front of the house.
The vine decal has an alpha mask to blend it into the wall. You can see what it looks like within the scene below:
Pasting the vine decal into the Unreal Engine scene. I can move it over any surface.
I am trying to layer the scene with various decals so I can really make it look like it is overgrown.
The vines ensnaring the walls of the entrance hall.
I think it's going to be really important to bring foliage into the interior. These decals are my first step to bringing in the more naturalistic elements from outdoors.
With the rise of 3D printing, high quality scans of real world objects have become increasingly easy for people to access. What this means for me as a 3D artist is that I now have a vast resource of detailed 3D models available to tap into.
I found this 3D scanned bust of Pallas Athena from the Altes museum in Berlin:
3D scanned bust of Athena.
I chose a bust of Pallas as a tribute to Edgar Alan Poe's The Raven. In that poem the bust of Pallas Athena represents wisdom, indicating the narrator was a scholar. I really admire when writers leave little clues that inform the reader about a character's personality. I am trying to do the exact same thing in a visual sense, so I wanted to pay homage by including a similar bust above the chamber door. Perhaps the former owner of my mansion also prided himself as a scholar?
In its raw form the model sits at over 600,000 thousand triangles. Obviously not feasible to use as a game asset:
The downloaded 3D model.
I created a low poly model around the high poly mesh and got it ready for surface transfer within Substance Painter:
The low poly variant of the bust of Pallas.
Baking and texturing the maps in Substance Painter was a fast process as I used a lot of smart materials to generate the dirt detail to highlight the bust's facial features.
The normal map of the bust.
The fully textured asset within Unreal Engine.
It's a bit jagged but because it takes up such a small amount of space in the environment I don't think this will be noticeable. Thanks to the availabilty of 3D scanned assets I now have a wide selection of easy to make 3D assets for my game environment. I don't want to rely too much on free assets however because I am using this project as a demonstration of my own modelling ability. As such I will use this technique when I need to quickly create something that is not feasible within my current timeframes.
I've been thinking how I can best utilise every element of my environment so that the mise-en-scene feeds the player as much visual information about the story as possible. I have a large area of empty wall space that I think could be put to better use, so today I will be experimenting with ways in which I can make them more thematically appropriate.
Below you can see an image of how the walls look in the current version of the scene:
This is an image from my scene where the walls have no material applied to them.
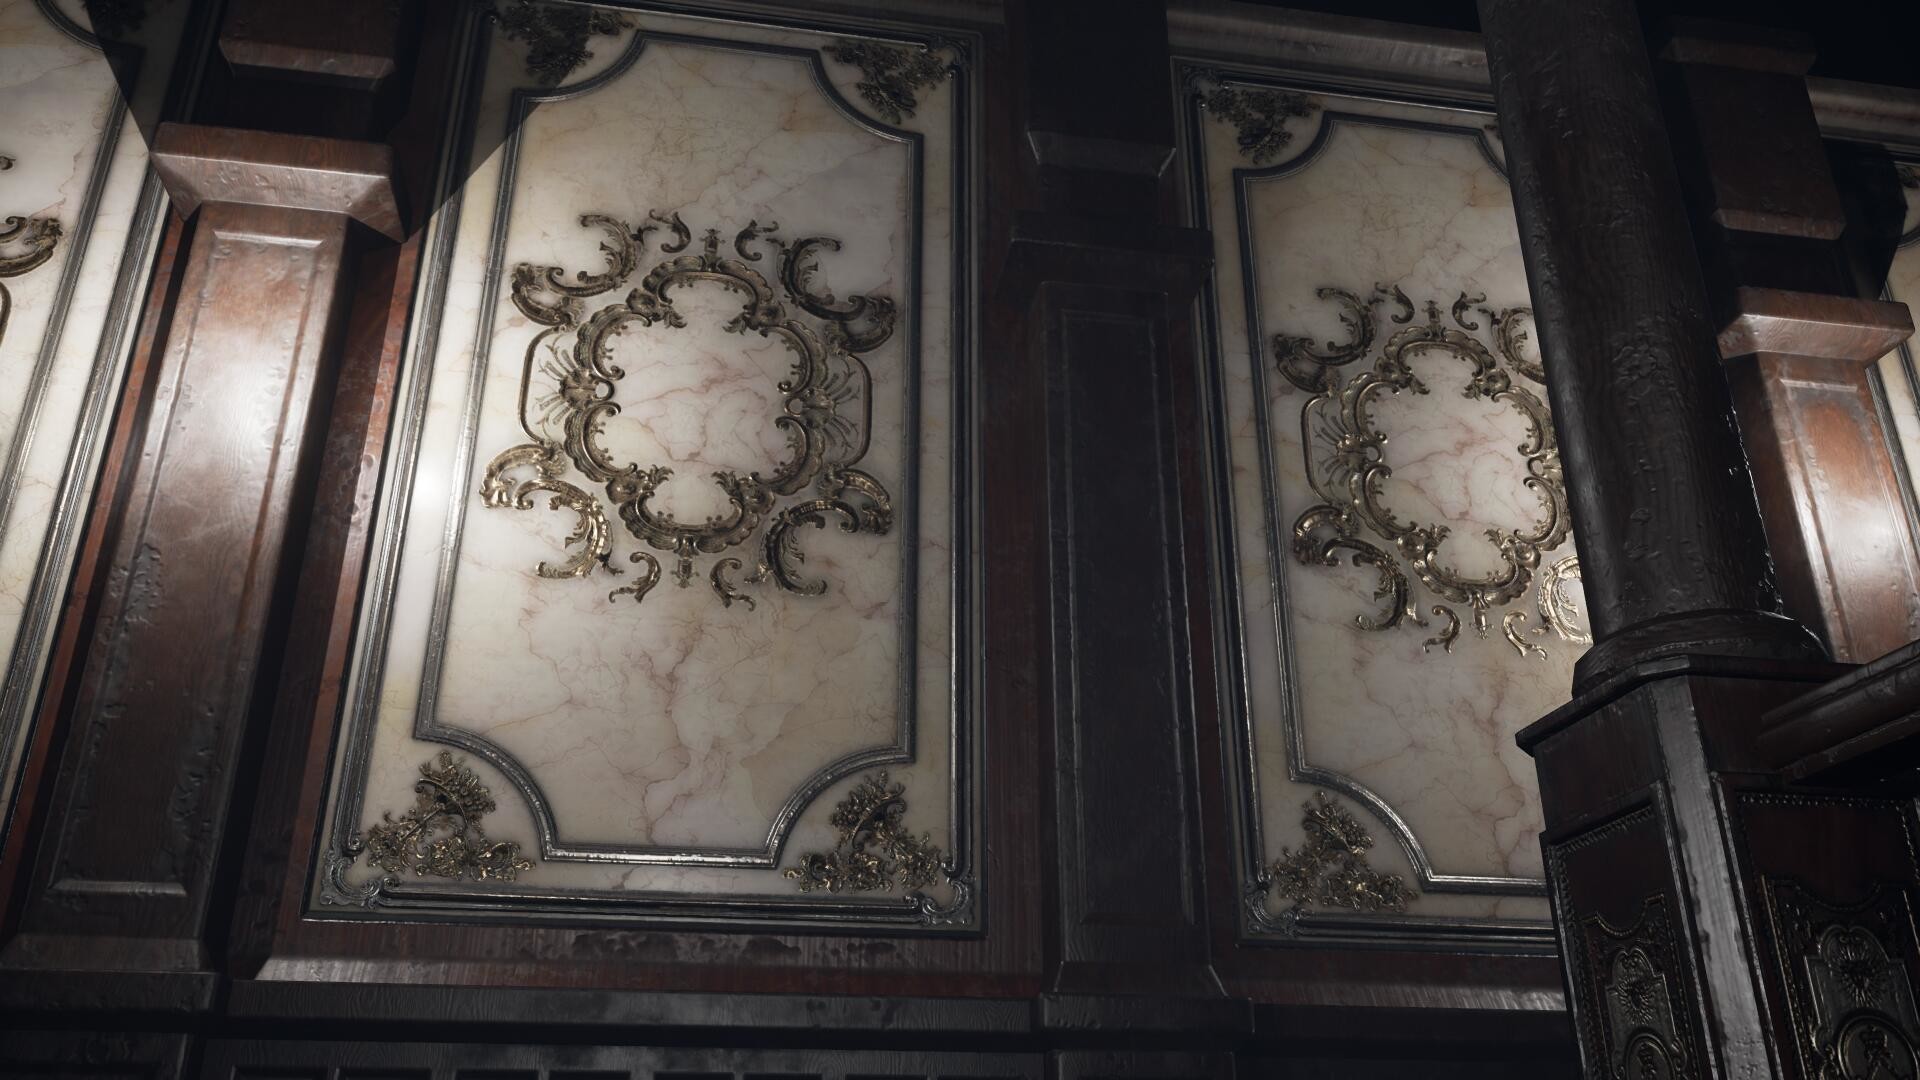
If you loaok at the walls carefully you can see an early pattern that I have modelled onto them. This is because I originally wanted to use a baroque pattern similar to B.O.W. Qin's work:
B.O.W. Qin's ornate wall panels.
Whilst I felt these looked nice, I didn't think using this element within my scene would be furthering my project goals which is to tell a story purely through visuals alone. I wanted to take this opportunity to show the level of decay the mansion has fallen into and didn't think using these patterns were the best way of doing that.
So deleting these, I have gone back into 3DS Max and created some new walls. I want to be able to give each segment of the wall it's own unique level of decay. I'm not sure what the best way to do this will be, but I know that I want to do this all within the material and not rely entirely on using decals in Unreal Engine. I can still choose to add them later on to further the level of decay on the walls, but I would rather be able to paint unique details in Substance Painter first so that I can make them less repetitive.
My new walls in 3DS Max. Each segment has been individually UV mapped with each one having its own material.
It is fortunate that I couldn't decide on the design of my walls sooner because it has led me to learning about Texture Sets within Substance Painter:
A video tutorial explaining texture sets within Substance Painter.
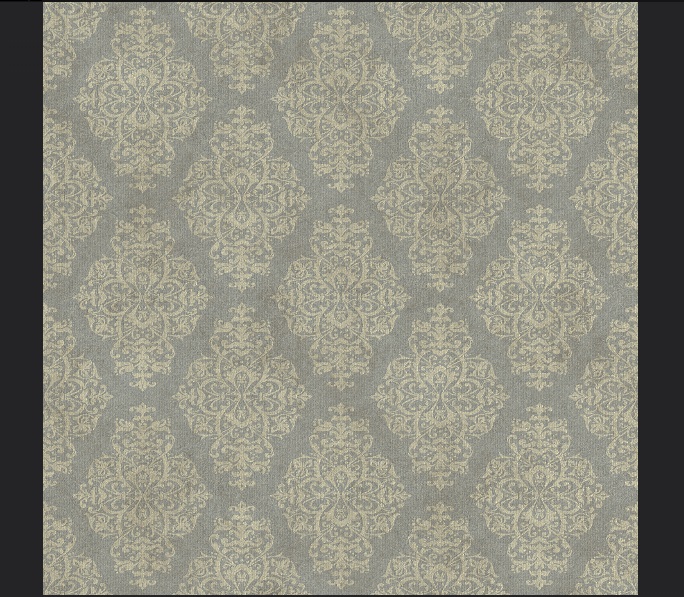
I have decided to use wallpaper to cover my walls. This is because I think wallpaper gives me a lot of room to get creative with the level of dereliction. I can make some strips of wallpaper peel off whilst others can be ripped. I think this will give me a nice mix of visuals and will push the "abandoned" vibe much more than if I had used the baroque pattern.
This is the wallpaper texture that I created in Substance Painter.
After watching the tutorial on how texture sets work, I found that I can load all of my different wall segments and paint them in on go within Substance Painter. I have made a wall paper
pattern and layered it up with varying levels of decay. When I begin
painting in Substance I will be able to create custom levels of
grime and dirt. See an example of this below:
I can paint on varying levels of decay to my wallpaper material. Some I will leave cracked, whilst others will be peeled off.
I have loaded all of my walls into the program. I had to copy my material layers from one set of materials to another in order for this to work. See the image below for what I mean:
Notice the layers tab in the top right of this image. I started by creating one material that I could paint details on to and when I was happy this looked good, I copied all of these layers into the other material slots. I have 8 materials in total.
I've had to copy each layer into a new material slot for this to work. Currently Substance doesn't let you paint them across all the elements within the scene, so I had to cycle between the material slots to paint on certain parts of the walls. Doing this has let me paint each wall segment with its own unique pattern.
So far I am really pleased with the look of these new walls and I feel they are going to be much stronger than what I originally had in mind. After this success I think I will see if there are other areas that I could perhaps make look more decayed.
A close up of the peeled wallpaper I have created in Substance Painter.
ALLEGORITHMIC (2015) Substance Painter Tutorial – Fundamentals 04: Texture Sets [Online Video]. August 13th.
Available from: https://www.youtube.com/watch?v=2NFXuFQYjvo [Accessed: 12/07/2018].
Lighting in Unreal Engine is an area that I have little confidence in. Whilst I understand the basic functions of the different types of lights and the other elements such as the skydome, there are some nebulous attributes that I am still struggling to understand. There are numerous values which can be edited within Unreal Engine and each one has a knock on effect that will determine how the final light bake will render. To make matters worse, I am stuck using an outdated version of the software so I am somewhat limited in how I approach lighting my environment. I am aware that later versions of the software have made improvements on the lighting aspect but for now I have to make do with what I've got.
To help me better understand the technical side of lighting scenes, I have been watching a series of video tutorials entitled "The Unreal Engine Lighting Academy". The author covers a variety of topics but one series I am particularly interested in, involves creating the lighting for a real time architectural visualisation scene:
This is the eleventh video in a series on lighting environments within Unreal Engine. This video focuses on a lighting setup for an architectural visualisation scene.
The video strips out the default lighting of the engine and rebuilds all the elements again from scratch. Because of this I was able to gain a better understanding of what everything does in the engine as I put them back into the scene one at a time. Below you can see a new scene I created in Unreal Engine so that I could quickly test different lighting settings without waiting for lengthy bake times.
This is a new scene that I created with my own custom lighting setup.
I wanted to see the effects of an HDRI lit skydome within an environment. I stripped out all the lighting elements and created a giant sphere within the scene. Following the video tutorial I found a good HDRI image and applied it to the sphere within the scene. What you see in the images here is the baked lighting from the HDRI skydome.
This image shows only the results of the skylight I created. Take note of the soft shadows I was able to achieve.
I like the subtle lighting the HDRI image is giving the environment. I think this will prove quite helpful for my main scene as the image itself would work as a nice backdrop for my mansion environment.
The HDRI skysphere works as a nice background for the environment.
In the video tutorial, the author mentions that he is using a multi-bounce skylight plugin. The effect of which is to more accurately bake the lighting. Below you can see the effect of a single bounce compared to multiple bounces.
A lighting bake created in Unreal Engine that demonstrates the difference in lighting quality between a single bounce and multiple bounces from a skylight. On the left is the default value and on the right is the multi-bounced skylight.
I have cropped the image below to give a better look at the effect the multiple bounces is having on the scene.
Multiple bounces from the skylight cause indirect lighting to be reflected on surfaces.
Originally Unreal Engine only allowed a single bounce for the skylight and I fear this may be true for the version I am using. I want the lighting bake to appear as realistic as I possibly can and may need to simulate these effects if need be, as I can't install custom plugins on the school machines.
I am nearing the end of week six and this marks the official halfway point of my project. Therefore I think I have had a sufficient amount of time to review the management of my project so far. I am going to be using the structure of Gibbs' Reflective Cycle to organise my thoughts below.
Over the past six weeks I have focused my efforts primarily on modelling the high poly and low poly assets for my environment. This has culminated in the first fully modelled area of the mansion scene, the entrance hall. Because I hadn't concerned myself with the lighting stage yet, everything was looking very flat and I wasn't happy with the overall look of the scene. It wasn't until recently that I added lights to the scene that have really helped it pop:
I feel just being able to see the scene lit in a nice way has given me so much confidence. Now that I have seen how the environment looks with this early lighting setup, I at least have an idea of how the final environment will look once I finish. Knowing that has helped me to speed up my modelling process as I know where the points of interest are in the scene. Going forward from here I think that I will be able to bring assets into unreal engine quicker because I know which areas are going to be seen thanks to the lighting.
So far I think that this project has been successful mainly due to the fact that it has provided me with the opportunity to model a decent range of high quality assets. I am particularly pleased with my armchair model as I used this piece as a test to help me present my portfolio better and it was met with positive feedback from environment artist Ryan Astley. I have opted for quality over quantity, as I would rather have a selection of polished assets in my portfolio than a large environment filled with mediocre ones.
That being said however, I was hoping to have much more completed by this point. I want the final game environment to give a sense of grandeur and scale and I believe I will need to have the exterior completed alongside a few additional rooms to achieve this.
As I continue to model assets and improve the lighting of the environment, I am going to be looking at other artefacts being produced by game developers to gain insight into the creative approaches they have employed and compare my own process to them. I think that a decent understanding of lighting for film and Mise-en-Scene will help me perfect the final look of the environment.
GIBBS, G. (1988) Learning by Doing: A guide to teaching and learning methods. Further Education Unit. Oxford Polytechnic: Oxford.
I've been considering where the best place to distribute my project online will be. My main platform will be Artstation as this gives me plenty of options in how I display images of the environment, video and individual asset pieces. The site is widely used by creative practitioners within the games industry, and I have been using it for several months now to house my professional portfolio. Youtube:
I will be posting my promotional video of the project onto Youtube as I already have an established Youtube channel and would like to continue to expand my audience. As the most popular video sharing website, I feel this maximises the chance of my work being seen by a larger audience.
Autodesk - The Rookies:
The Autodesk competition The Rookies, is also a great way to share work with fellow practitioners. The competition is open to both graduates and alumni and although this project won't be finished in time to enter this year, I intend to submit it next year.
Instagram:
I want to make use of social media platforms such as Instagram as well because the tagging feature lets you share images with an audience across a variety of different interests and specialisms. This gives my work far greater exposure than if I keep it to professional sites like Artstation.
I am hoping by hosting my work on these platforms I will generate interest in my work and establish an audience for my future projects. I will be doing some research into other vectors of dissemination, as the ones listed here are my starting points.
During this week I have been practicing my prop modelling skills. I have been watching a series of tutorials on Pluralsight.com by 3D artist Dan Cox. He discusses the fastest methods to create props and focuses on ways to optimize the assets.
A large part of the course is spent using ZBrush which has illustrated to me the importance of using digital sculpting in my workflow. Cox was able to sculpt a high poly mesh in ZBrush and then toggling between varying levels of detail using Subdivision levels. Lowering the polycount in this way is incredibly helpful as it keeps the sculpt's silhouette intact across the different levels of detail.
I have tried to lower the polycount of my models in 3DS before but I have had to be very careful when doing so because deleting the edges and vertices of a model manually can sometimes make the low poly's silhouette too different from the high poly version. Because ZBrush has some great tools for retopologizing a model such as "dynamesh," I can always import my high poly models from 3DS Max into the software and use its tools instead. This won't give me as much control as if I had sculpted in ZBrush to begin with but it will save me time in my current workflow.
I have also been browsing the Polycount forums and trying to determine what differences there are between a game artist environment pipeline and prop artist work pipeline. I found a short thread on Polycount with the general consensus being that depending on the studio, I may have to do both environment modelling (with care for composition) and prop modelling (working in isolation on prop assets where there placement within the level is not one of my duties).
With this in mind I will be creating props that I can both use in my environment, but are also good enough to stand up to scrutiny on their own. I have created a chandelier asset that will be one of the focal points within my environment.
The high poly chandelier model. I only created one arm so that I could duplicate it once it was textured.
I started by creating a single arm that would hold the candelsticks and then exploded the model so that I could bake it in Substance Painter:
On the left is the low poly model and on the right is the exploded mesh ready for texturing in Substance Painter.
Below you can see the texture maps I created for the chandelier in Substance Painter:
The texture maps I baked out of Substance Painter.
Below you can see the finished asset in Unreal Engine:
The chandelier in Unreal Engine.
I will be modeling some other props for my portfolio during the next few days as I really enjoyed creating this. I will be using ZBrush to help retopologize some of the geometry as this helped a lot with this asset.
A big source of inspiration for me is the work of artist Joel Zakrission from DICE game studios. Joel has lots of intricately modelled assets on his Artstation all of which are extremely high quality.
ZAKRISSON, J. (2017). Mansion Hall.
[Online Image] Available at: https://www.artstation.com/artwork/deoLe [07/06/2018].
I think his mansion environment is fantastic as it features so many varied assets that really help bring the scene to life. I particularly like the grandfather clock so I went about creating one for my scene.
Here's the model as seen in 3DS Max:
My grandfather clock asset. From left to right: the low poly, wireframe and high poly model.
For the clock face I reused the swirly decals that I had modelled for other assets like the fireplace and the sconce:
The high poly clock face.
I used material ID masks in Substance painter to help me quickly apply a metallic gold material onto the swirly details. In the images above notice that the details on the high poly models are all an orange colour. This was how I generated the material ID's for the texture.
You can see how the finished asset looks in my Unreal Engine scene below:
Currently I feel that some elements of the clock still need work. The clock hands seem far too dark and I can't see any ot the detail on them. I also feel that lighting my scene effectively will be crucial in getting comparable results to Joel Zakrisson, as he has used a complimentary blue light to add some contrast to his scene.
I think the asset is a success from a technical standpoint as it has a very low polycount and readable silhouette. In fact I probably could have gotten away with using more polygons if I wanted, as it is a hero asset that will only feature once in the environment.
I used this as test to see if I could create a high poly game ready asset. I intend to make several more assets of this quality to give myself a greater chance of employability by diversifying my portfolio.
Throughout opulent architectural design, I have noted the prominence of sweeping ornate decals. This is a design element that is particularly common within the Baroque architectural period and the excessive amount of detail exemplifies the elegance and decadence of the people who used to reside in such places.
Baroque decals.
Because these designs are very much a staple of classical architecture, I felt my mansion environment would feel incomplete if it did not include them. The owner of my mansion was someone who sought to impress, therefore it makes logical sense that his home would replicate the excessive style of the Baroque architectural period.
I decided to invest some time into creating different elements that I could repeat throughout my environment:
I created these details in 3DS
Max. I kept them low poly so that I could easily simulate curved
surfaces by applying the turbo smooth modifier to them.
As a test, I combined my newly created details together to make a sconce prop which is a type of light fixture that protrudes from a wall.
The elements combined together to create the main body of the sconce asset.
I wanted to create a small asset that I could show all of the details I had created in a concise way. I have added this piece to my Artstation portfolio and will continue to update it as I create more assets.
The elements combined together to create the main body of the sconce asset.
Below you can see how the asset looks in the game engine so far. It's looking a little blown out on the candle sticks at the moment so I will need to edit the material's attributes for better integration within the environment.
The completed sconce in the Unreal Engine environment.
I have begun creating the first of what I hope will be many assets, an ornate fireplace for the mansion's entrance hall. Using hard surface transfer techniques within Substance Painter, I will be transferring a high poly fireplace onto a low poly equivalent to simulate detail. This will keep things optimised within Unreal Engine.
I started by looking at some designs of fireplaces in mansions.
I really love the elongated look of these as their sheer size makes them quite intimidating in appearance. This is a design aspect that I am interested in replicating throughout my scene, as I am aiming to create a sense of grandeur and scale that will be reflected in all the assets of the environment.
Below you can see the high poly model as seen in the 3DS Max viewport:
The lower portion of the mansion fireplace.
Front orthographic view:
Below you can see the inset hearth that I have treated as a seperate asset because it will be using a different material from the main body:
I also modelled some additional floral details to add some variety to the surface areas of the model:
I created these ornate details within 3DS max. I took my time to make sure the topology was clean, however this was something I could have perhaps not stressed over, as much of these details would only be transferred over to the low poly model. In the future I will most likely reuse these details for other models rather than create more custom details.
Below you can see the low poly model of the fireplace:
I created the model and UV mapped it pretty quickly, however I did encounter a rather frustrating problem when it came to projecting the high poly details onto the model. I found that if certain parts of the model were close together, then Substance Painter would have trouble projecting details onto them. For example the details only meant for a particular surface would bleed onto the ones adjacent to it. To avoid this I had to seperate all the elements of the model and bake the details onto them individually. When this was done I had to bring all the seperate maps into photoshop and manually piece them back together. This took a REALLY long time and I'm trying to find an alternative to doing this for every asset with lots of overlapping details.
You can see how the asset looks so far in Unreal Engine below: